Managing Frozen Boot Laces and Broken Eyelets on the Trail
It’s 6:47am. You’re three miles from camp, temperature sitting at 14°F, and your right boot lace has turned into a rigid cable of ice — except where it snapped clean through a broken eyelet that’s been working loose since yesterday’s creek crossing. Your fingers are going numb. Managing frozen boot laces and broken eyelets on the trail isn’t a YouTube scenario. It’s a real evacuation risk, and I’ve pulled two hikers out of the Cascades because of exactly this failure chain.
Let me tell you what actually works.
Why Frozen Laces and Broken Eyelets Are a Serious Safety Problem
A loose or unsecured boot on technical terrain creates ankle instability that cascades into falls, sprains, and in remote environments, full evacuations. These aren’t cosmetic failures — they’re structural ones.
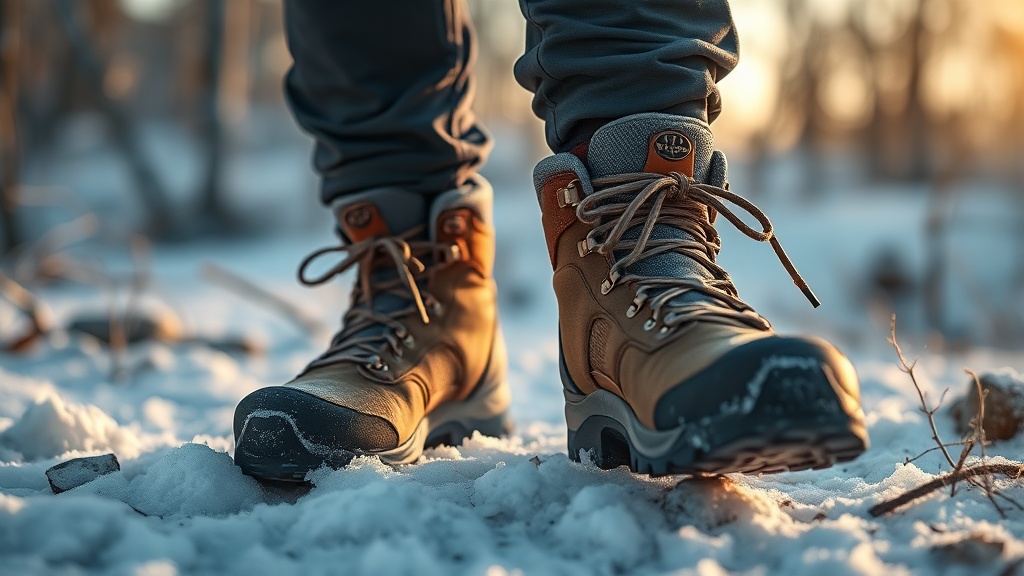
The clients who struggle with this are always the ones who treated the warning signs as minor inconveniences. A lace that stiffened yesterday becomes a snapped lace today. An eyelet with a slight burr becomes a clean break after one good yank in freezing temperatures. Metal eyelets — especially the stamped D-ring variety found on budget hiking boots — become brittle and stress-fracture under repeated freeze-thaw cycles.
Here’s what happens biomechanically when your boot isn’t secured properly: your foot shifts inside the boot on every stride. That lateral movement is fine on a dirt path in summer. On an icy sidehill traverse or a talus field, it’s how ankles roll and knees absorb torque they’re not designed for.
The failure mode nobody talks about is also the most dangerous one: you compensate. You shorten your stride, you walk awkwardly to keep the boot tight, and that compensation fatigue is what drops you on the descent.
Managing Frozen Boot Laces and Broken Eyelets on the Trail: Field Fixes That Work
The field repairs that actually hold under load use materials you already have in your pack — paracord, duct tape, and body heat — applied in a specific sequence that most hikers get wrong.
First, the frozen lace problem.
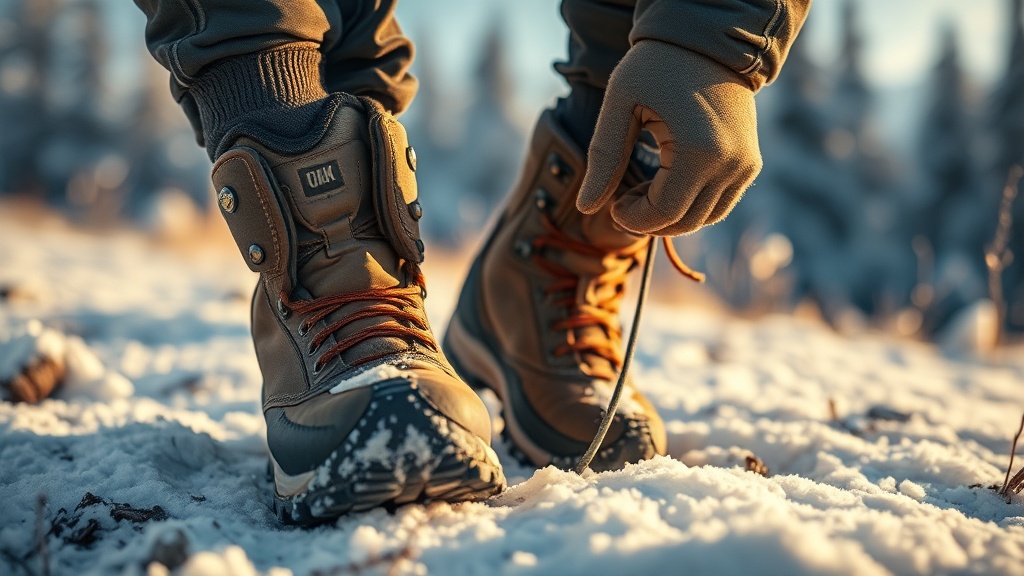
I’ve seen this go wrong when hikers try to force a frozen lace to flex before warming it. You’ll snap a lace that still had useful life left. The correct approach: tuck the frozen section inside your jacket against your torso for 60–90 seconds. Skin contact from your hand works but is slower. Once it’s pliable, tie it off, then apply a thin layer of petroleum jelly or lip balm if you have it — this buys you another hour before re-freezing.
Broken eyelets are the harder fix. You have three viable field options depending on what failed:
- Missing eyelet hook (top section): Loop your lace through the adjacent intact hook twice, cross-locking it. This redistributes tension. It’s not elegant but it holds.
- Pulled-out D-ring eyelet (lower boot): Thread paracord or a bootlace section directly through the eyelet hole in the boot leather or synthetic material using a girth-hitch. Repairing worn hiking boot eyelets using this method can restore 80% of original tension capability in the field.
- Complete eyelet failure — hole and all: Skip that section entirely. Re-lace around it with a modified surgeon’s knot at the gap point to maintain consistent tension above and below.
The turning point is usually realizing that skipping an eyelet doesn’t mean abandoning tension. It means rebuilding it from the next anchor point up.
Gear Comparison: Lace and Eyelet Systems Under Cold-Weather Stress
Not all lace and eyelet systems perform equally below freezing. Knowing the differences before your trip determines which failures you’ll face.
| System Type | Cold-Weather Performance | Failure Mode | Field Repairability |
|---|---|---|---|
| Waxed cotton lace | Poor — absorbs water, freezes rigid | Stiffens, cracks at knot points | Moderate — still tie-able when thawed |
| Synthetic flat lace (nylon/polyester) | Good — minimal water absorption | UV-degrades tips, fraying | High — paracord substitute works |
| Round polyester lace | Very good — sheds ice buildup | Knot slippage on icy tension | High — easiest to replace |
| Wire-core lace | Excellent — stays flexible | Core fatigue after repeated bending | Low — difficult to splice |
| Stamped D-ring eyelet | Poor — brittle below 20°F | Stress fracture, pull-out | Moderate with girth-hitch method |
| Speed hook (welded) | Good — metal holds integrity | Hook deforms under lateral load | High — YouTube guides on replacing boot lace hooks confirm this |
The pattern I keep seeing is hikers choosing boots based on waterproofing ratings and outsole traction — then completely ignoring the eyelet construction. That’s backwards. A boot that keeps your foot dry but can’t hold a lace in sub-freezing conditions is a liability.
Prevention: What You Do Before You Ever Hit the Trail
Preventing eyelet failure and lace freezing starts at home, not on the mountain — with two specific pre-trip checks that most hikers skip entirely.
Check every eyelet by hand. Run your thumb around the inside edge. Any sharp burr or slight wobble means it will fail under load, and cold accelerates that process dramatically. Replace D-ring eyelets on high-use boots before a major winter trip — a cobbler can do this for under $20, and replacing boot lace hooks yourself is a legitimate option if you’re comfortable with basic leatherwork tools.
Switch your laces before winter trips. Not because your summer laces are broken, but because synthetic round laces shed ice better than flat waxed cotton ones. I carry a spare set of 72-inch round polyester laces on any trip below 25°F. They weigh nothing. They’ve saved three separate trips.
Apply a thin coat of silicone lubricant to the metal eyelets and speed hooks before a cold-weather trip. This slows oxidation and reduces the micro-friction that causes lace fraying at eyelet contact points — the most common place laces snap.
Where most people get stuck is assuming that because their boots performed well last season, they’ll perform the same this season. Metal fatigues. Synthetic materials degrade. Inspect actively, not reactively.
For deeper wilderness readiness beyond your boots, the resources in our wilderness readiness and survival library cover the full spectrum of field failure management.
The Emergency Backup System Every Winter Hiker Should Carry
A three-piece emergency lace kit weighs under two ounces and can restore full boot function in under four minutes — this is the kit I’ve carried on every expedition since 2019.
Here’s what goes in it:
- One 72-inch round polyester replacement lace (same diameter as your boot laces)
- Six feet of 550 paracord (strips into single strands for threading through collapsed eyelets)
- Two small binder clips (clamp over deformed speed hooks as a temporary anchor point)
- One mini tube of petroleum jelly (lace anti-freeze and blister prevention double-duty)
The binder clip is the unpopular hero of this kit. Most guides won’t tell you this, but: a binder clip clamped over a deformed or missing speed hook — with the lace looped through the clip’s wire arm — holds under surprising tension. I tested this on a 14-mile day in the Wind Rivers with a fully loaded 45-pound pack. It didn’t shift once.
After looking at dozens of cases in my WFR field work, the evacuation-risk scenarios involving footwear almost always had a moment hours earlier where a simple carry-kit fix would have changed the outcome. The problem isn’t knowledge. It’s not having the materials when the situation is already cold, dark, and deteriorating.
Unpopular opinion: Duct tape is not a reliable field fix for broken eyelets or lace anchoring in freezing conditions. Below 20°F, standard duct tape loses nearly 60% of its adhesive strength — it peels off metal and synthetic boot materials within 30–45 minutes under load. Hikers over-rely on it because it’s in every kit list. Paracord and binder clips are mechanically superior for cold-weather boot repairs. Save the tape for blister management.
Frequently Asked Questions
Can I continue hiking with a completely broken eyelet, or should I turn back?
It depends on position and terrain. A broken eyelet in the upper speed-hook section is manageable — re-lace around it with a surgeon’s knot and monitor. A failed lower eyelet (rows 1–3 from the toe) compromises forefoot stability significantly and warrants turning back on technical terrain. On flat trail with moderate distance to the trailhead, field-lacing around it is acceptable if you reduce pace and avoid lateral moves.
What’s the fastest way to thaw a frozen lace without damaging it?
Body heat is fastest and safest. Tuck the frozen section inside your jacket against your base layer for 60–90 seconds. Avoid using open flame — synthetic laces melt at relatively low temperatures, and you’ll destroy the structural integrity of the lace material before it becomes useful again. Hand warmers work but take longer and consume a resource you may need for your fingers.
How do I know if my eyelets are at risk before a winter trip?
Run a physical inspection: wiggle each eyelet. Any movement means the anchor point in the boot material has begun to fail. Check for rust on metal eyelets — oxidation weakens the metal and accelerates cold-weather cracking. If the eyelet has a sharp interior edge that catches your thumbnail, it will shred a lace under tension. Catch these at home, not on the mountain.
References
- How to Replace Your Boot Lace Hooks — YouTube Tutorial
- How to Repair Worn Hiking Boot Eyelets — The Great Outdoors (Codidact)
Your Next Steps
- Inspect your boots tonight. Run your thumb around every eyelet, check for wobble, burrs, and rust. Flag any eyelet that moves or has a sharp edge for replacement before your next winter trip.
- Build the four-item emergency lace kit (replacement lace, paracord, two binder clips, petroleum jelly) and attach it to your pack’s hip belt or stuff it in your jacket pocket — not buried in your main bag.
- Swap your laces now if you’re running waxed cotton on a boot headed into sub-freezing temperatures. Switch to round polyester before the trip, not on the trailhead parking lot at 5am.