When you are deep in the backcountry — miles from the nearest road and hours from definitive medical care — your knowledge of Wilderness First Aid (WFA) is the most valuable piece of gear you carry. Unlike urban emergency medicine, where paramedics can arrive in under ten minutes, wilderness medicine demands that you sustain life, manage resources, and make critical decisions in austere environments where professional help may be delayed by many hours or even days. This guide, written from the perspective of a WFR-certified practitioner, breaks down the core protocols every backcountry traveler must understand before they leave the trailhead.
The skills covered here are not theoretical exercises. They are the same frameworks taught in accredited Wilderness First Responder courses and applied in real search-and-rescue operations. Whether you are a seasoned mountaineer, a backpacking guide, or simply someone who spends significant time outdoors, mastering these protocols could be the deciding factor between a successful evacuation and a preventable fatality.
What Is Wilderness First Aid and Why Does It Matter?
Wilderness First Aid is a specialized medical discipline designed for emergencies where Emergency Medical Services (EMS) are delayed by more than one hour, requiring rescuers to assess, treat, and monitor patients using limited equipment over extended periods in remote environments.
The defining characteristic of wilderness medicine is the extended patient care interval. In an urban setting, a first responder’s primary job is to stabilize a patient and hand them off quickly. In the wilderness, that handoff may not happen for twelve, twenty-four, or even forty-eight hours. This reality fundamentally changes how you approach every injury and illness. You are not simply buying time — you are providing sustained care.
According to the Wikipedia overview of Wilderness Medicine, the field formally developed from military medicine and mountaineering rescue practices, evolving into a distinct discipline with standardized curricula now taught by organizations such as NOLS Wilderness Medicine and Wilderness Medical Associates International. This formal structure matters because it means the protocols you learn are evidence-based, peer-reviewed, and refined through decades of field application.
The practical implication is clear: a person trained in WFA thinks differently. They consider long-term wound management, the logistics of patient packaging for evacuation, the risk of secondary injuries during transport, and the psychological demands placed on both the patient and the rescue team. This is the mindset you must develop.
The Patient Assessment System: Your Non-Negotiable Framework
The Patient Assessment System (PAS) is the standardized, step-by-step framework used in remote environments to systematically identify and treat life threats, beginning with rescuer safety and progressing through a thorough head-to-toe evaluation.
Every intervention you perform in the wilderness should flow from the Patient Assessment System (PAS) — a structured sequence that prevents tunnel vision and ensures you do not miss a hidden, life-threatening injury while fixating on an obvious but less critical one. The PAS is built on the following hierarchy:
- Scene Size-Up: Before you touch the patient, evaluate the environment. Is there rockfall overhead? Are you on a slope that could avalanche? Is the patient near a cliff edge? Scene size-up is the first and most critical step of the PAS because a rescuer who becomes injured cannot help anyone. Assess for ongoing hazards, establish the mechanism of injury, and count the number of patients before proceeding.
- Primary Survey (Life Threats First): Address the ABCs — Airway, Breathing, and Circulation — in that order. If the patient is unresponsive and has no pulse, initiate CPR. If there is massive hemorrhage, it must be controlled immediately, before almost any other intervention, because a patient can bleed to death in minutes.
- Secondary Survey (Head-to-Toe Exam): Once life threats are controlled, perform a systematic physical examination from the scalp to the soles of the feet. Palpate for tenderness, deformity, crepitus, and swelling. Record baseline vital signs — level of responsiveness, heart rate, respiratory rate, skin color and temperature, and pupil reactivity — and continue monitoring them at regular intervals throughout care.
- Ongoing Patient Monitoring (SOAP Notes): Document your findings using a Subjective, Objective, Assessment, Plan (SOAP) format. This record becomes invaluable when you hand the patient off to EMS and cannot communicate verbally due to time pressure or noise.
The PAS is not a rigid checklist to be rushed through — it is a dynamic, repeatable process. As a patient’s condition changes, you cycle back through it. A patient who was stable an hour ago may now show signs of internal bleeding or shock, and the PAS gives you the framework to catch that deterioration before it becomes irreversible.

Hemorrhage Control: Stopping Life-Threatening Bleeding
Life-threatening external bleeding must be addressed immediately using direct pressure applied firmly to the wound, or with a commercial tourniquet placed high and tight on the limb — this intervention takes priority over nearly all other assessments.
Uncontrolled hemorrhage is the leading cause of preventable death in trauma scenarios. Modern WFA protocols, updated following extensive military combat medicine research, prioritize hemorrhage control even above airway management in cases of severe external bleeding. The reasoning is physiological: you can manage an airway in a patient who still has circulating blood volume, but a patient in hemorrhagic shock cannot be resuscitated in the backcountry.
The protocol is direct and decisive. Apply firm, unrelenting direct pressure to the wound using a gloved hand and any available clean cloth or gauze. If direct pressure fails to control arterial or severe venous bleeding from a limb, apply a commercial tourniquet — such as a CAT (Combat Application Tourniquet) — high and tight on the limb, meaning as far proximal toward the torso as possible, and tighten it until the bleeding stops completely. Note the time of application clearly on the patient’s forehead or on the tourniquet itself.
“Tourniquet use in the wilderness is a life-saving intervention when indicated. The fear of limb loss from tourniquet application is largely a myth perpetuated by outdated training. Modern evidence supports their safe use for several hours without permanent damage.”
— Wilderness First Responder Core Curriculum, Field Evidence Review
For wounds that are not amenable to tourniquet application — such as junctional wounds at the groin, axilla, or neck — pack the wound tightly with gauze and apply sustained direct pressure for a minimum of three to five minutes. Do not lift the dressing to check the wound, as this disrupts clot formation.
Wound Irrigation and Infection Prevention in the Field
High-pressure wound irrigation with disinfected water is the gold standard for backcountry wound care, effectively removing bacteria and debris to prevent infection when suturing and advanced wound closure are unavailable.
In the backcountry, a seemingly minor laceration carries serious infection risk. Dirt, organic debris, and environmental bacteria — including Clostridium species responsible for tetanus — can contaminate even shallow wounds. The most evidence-based intervention available to a wilderness first responder is aggressive high-pressure irrigation: using a syringe (ideally 20–35 mL with an 18-gauge tip) or a plastic bag with a small pinhole to deliver a forceful stream of clean water directly into the wound bed.
- Use at least 100–200 mL of potable or disinfected water per centimeter of wound length.
- Hold the irrigation device approximately two to three centimeters from the wound surface to maximize pressure and debris removal.
- Do not irrigate with full-strength iodine, hydrogen peroxide, or alcohol directly inside the wound cavity — these agents are cytotoxic to the healthy fibroblasts and macrophages responsible for tissue repair, and their use inside wounds delays healing.
- Dilute povidone-iodine (0.9% solution) may be used as an irrigant in high-risk contamination scenarios, but plain disinfected water is effective and less damaging in most cases.
- After irrigation, loosely close the wound with wound closure strips if available, or leave it open to drain in high-contamination environments. Cover with a clean, non-adherent dressing.
Monitor the wound every four to six hours for signs of developing infection: increasing redness, warmth, swelling beyond the wound margins, purulent discharge, and red streaking tracking proximally from the wound (a sign of lymphangitis requiring urgent evacuation).
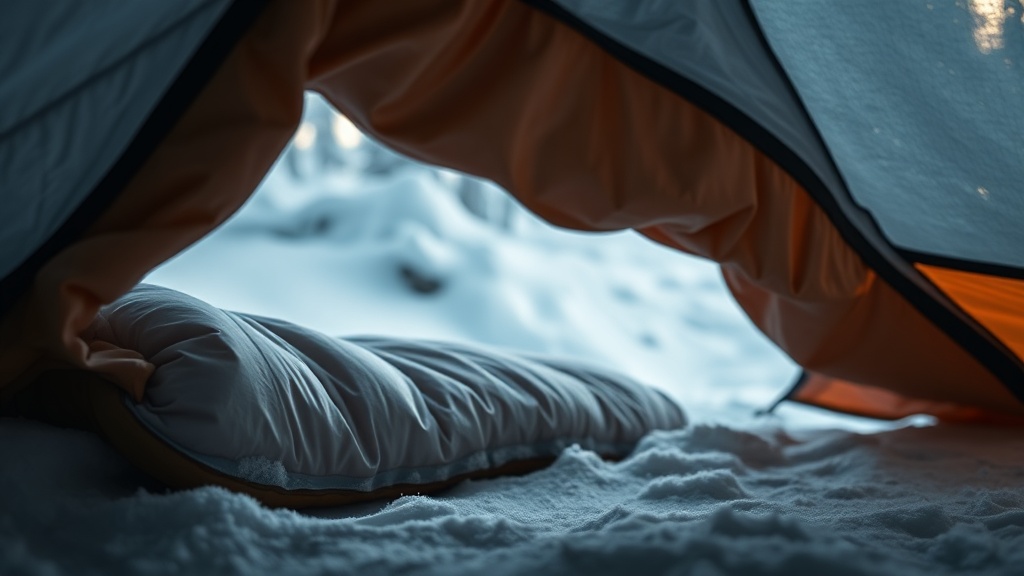
Hypothermia Prevention and the Hypo-Wrap Protocol
Hypothermia is a constant and underestimated wilderness threat because the human body loses heat up to 25 times faster in wet conditions than in dry ones — prevention, early recognition, and aggressive field rewarming are essential survival skills.
Hypothermia occurs when core body temperature drops below 35°C (95°F). Its insidious danger lies in how gradually and imperceptibly it develops. A patient who is wet, fatigued, and mildly underfed can slip into mild hypothermia even at temperatures well above freezing, particularly when wind is present.
The body loses heat through five mechanisms: radiation, conduction, convection, evaporation, and respiration. Wet clothing dramatically accelerates conductive and evaporative heat loss, which explains why the backcountry axiom “cotton kills” carries such weight. Synthetic and wool base layers retain insulating properties when wet; cotton does not.
Field management of hypothermia centers on what WFR training calls the hypo-wrap:
- Remove all wet clothing and replace with dry insulation layers if available.
- Place an insulating pad (closed-cell foam preferred) beneath the patient to block ground conduction, which is the most aggressive heat loss pathway.
- Wrap the patient in sleeping bags, space blankets, or any available insulating material, paying particular attention to the head, neck, and armpits where heat loss is greatest.
- Cover the entire assembly with a waterproof outer layer (a tarp, bivy sack, or emergency blanket).
- Apply external heat sources — chemical heat packs or warm water bottles — to the neck, armpits, and groin only (high-vascularity zones), never directly to the extremities, which can cause afterdrop and paradoxical core cooling.
- If the patient is alert enough to swallow safely, provide warm, sweet fluids to support metabolic heat production.
It is also critical to address dehydration in any hypothermia patient. Dehydration reduces circulating blood volume, impairs peripheral circulation, and diminishes the body’s capacity for thermogenesis. Fluid management is therefore not secondary to hypothermia treatment — it is an integral component of it. The same principle applies across virtually all environmental illnesses: dehydration consistently exacerbates heat exhaustion, altitude sickness, and exercise-induced hyponatremia, making aggressive fluid management a cornerstone of wilderness care.
Wilderness Splinting and Musculoskeletal Injury Management
Effective wilderness splinting requires immobilizing the joint above and the joint below the suspected fracture site, followed by a mandatory check of circulation, sensation, and motion (CSM) distal to the injury to confirm neurovascular integrity.
Fractures and dislocations are among the most common serious injuries encountered in the backcountry. The goal of field splinting is not to reduce the fracture — attempting closed reduction in the wilderness without imaging and proper training risks catastrophic neurovascular injury. The goal is to immobilize the injury to minimize pain, prevent further soft tissue damage, and facilitate safe evacuation.
- Improvised Splinting Materials: Trekking poles, tent stakes, rolled sleeping pads, sticks, and thick clothing can all serve as effective splinting materials. The key is rigidity and adequate padding to prevent pressure sores and constriction.
- Immobilize One Joint Above and One Below: For a suspected mid-shaft tibia fracture, the splint must extend from above the knee to below the ankle. For a wrist fracture, immobilize from below the elbow to the palm.
- CSM Check — Non-Negotiable: Before and after applying the splint, and at regular intervals during evacuation, assess circulation, sensation, and motion (CSM) distal to the injury. Check capillary refill, the patient’s ability to feel light touch, and their ability to wiggle fingers or toes. Deteriorating CSM indicates vascular compromise or compartment syndrome and demands immediate splint adjustment or urgent evacuation.
- Traction Splinting for Femur Fractures: A mid-shaft femur fracture can cause internal hemorrhage of up to 1–2 liters into the thigh musculature. If a commercial traction splint is available, apply it to reduce pain and hemorrhage. Monitor for signs of shock throughout transport.
Always position the injured limb in the position of function whenever possible — a hand splinted with fingers slightly curled as if holding a ball, and an ankle splinted at 90 degrees. This reduces long-term dysfunction if definitive care is delayed.
Frequently Asked Questions
How is Wilderness First Aid different from standard first aid?
Standard first aid is designed as a bridge until EMS arrives, typically within minutes. Wilderness First Aid (WFA) is specifically engineered for scenarios where emergency medical services are delayed by more than one hour — often by many hours or days. This extended care interval requires WFA practitioners to monitor patients over time, manage limited resources, make evacuation decisions, and perform interventions that standard first aid courses do not cover, such as wound irrigation, splinting, hypothermia management, and patient packaging for evacuation.
What should I do first when I encounter an injured person in the backcountry?
Your first action must always be a scene size-up — evaluate the environment for hazards that could injure you or other rescuers before you approach the patient. Once the scene is confirmed safe, begin your primary survey, addressing the ABCs (Airway, Breathing, Circulation) and controlling any life-threatening bleeding. The Patient Assessment System (PAS) provides the structured framework for every step that follows, from the initial scene assessment through the head-to-toe secondary survey and ongoing patient monitoring.
Why is hydration so important in wilderness medical emergencies?
Dehydration exacerbates nearly every environmental illness and medical emergency encountered in the backcountry. Reduced blood volume impairs the cardiovascular system’s ability to manage heat, cope with blood loss, and maintain core temperature during hypothermia. Dehydration also impairs cognitive function, directly compromising the decision-making ability of both the patient and the rescuers. Fluid management is therefore a foundational component of wilderness care, not an afterthought, and should be monitored and addressed proactively in all extended patient care situations.
References
- NOLS Wilderness Medicine. Wilderness Medicine Course Curriculum. https://www.nols.edu/en/wilderness-medicine/
- Wilderness Medical Associates International. Wilderness First Responder Standards and Protocols. https://www.wildmed.com/
- Forgey, W. W. Wilderness Medicine: Beyond First Aid. 6th ed. Globe Pequot Press, 2012.
- American Red Cross. Wilderness and Remote First Aid Program. https://www.redcross.org
- Auerbach, P. S. Wilderness Medicine. 7th ed. Elsevier, 2017. (Peer-reviewed reference standard for expedition and wilderness medicine practitioners.)
- Wikipedia. Wilderness Medicine — Overview and Historical Development. https://en.wikipedia.org/wiki/Wilderness_medicine