Executive Summary
White gas stoves depend on a pressurized fuel bottle to deliver liquid fuel through the generator loop. At high altitudes, lower temperatures and reduced atmospheric pressure cause pump cups, O-rings, and check valves to lose their seals — often resulting in dangerous pressure loss. This guide walks you through every diagnostic step and field repair technique needed to restore full stove function before conditions deteriorate. Key actions: lubricate the pump cup, inspect the O-ring, clean the check valve, and clear any fuel-line debris.
- Inspect the pump cup for dryness, cracks, or deformation.
- Lubricate leather or rubber seals with silicone grease or pump cup oil.
- Check and replace the O-ring at the fuel bottle interface.
- Clean the check valve to restore one-way airflow.
- Clear carbon or debris buildup from the fuel jet and line.
Why White Gas Stoves Lose Pressure at High Altitude
White gas stoves fail to maintain pressure at high altitudes primarily because cold temperatures cause rubber and leather pump components to shrink and harden, breaking the airtight seal essential for forcing liquid fuel through the generator loop. Understanding this mechanism is the foundation of any effective field repair.
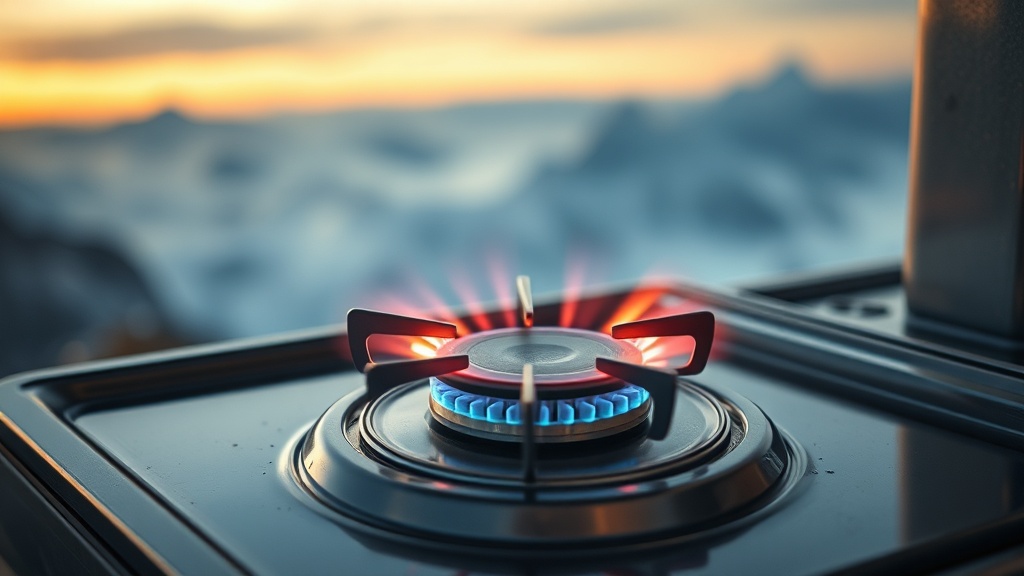
A white gas stove — such as those manufactured by MSR or Primus — operates on a deceptively simple principle: a hand-operated pump compresses air into a sealed fuel bottle, building enough pressure to push liquid fuel up through a generator tube, where it vaporizes and ignites. Every component in this system must maintain an airtight connection. When any single seal fails, the entire pressure chain collapses.
High-altitude environments create a uniquely hostile set of conditions for these mechanical seals. Lower ambient temperatures cause elastomeric materials — rubbers, synthetic compounds, and even leather — to lose their natural flexibility and compress inward. Simultaneously, reduced atmospheric pressure changes the pressure differential across every seal in the pump assembly. The result is a stove that feels normal in your kitchen but refuses to build sustainable pressure at 14,000 feet, precisely when you need it most.
A foundational principle in applied thermodynamics explains this clearly: gas behavior and material elasticity are both temperature-dependent. Cold O-rings and pump cups no longer exert outward radial force against the cylinder wall with sufficient consistency, allowing micro-leaks that bleed pressure as fast as you can pump it in. Recognizing this physics is the first step toward a confident field fix.
Diagnosing the Source of Pressure Loss
Diagnosing white gas stove pressure loss requires systematically checking the pump cup, check valve, O-rings, and fuel line in that order, since each component presents distinct failure symptoms that are identifiable even without specialized tools in the field.
Before disassembling anything, perform a quick functional test. Attach the pump to a partially filled fuel bottle and pump ten full strokes. If you feel little to no resistance in the handle from stroke one, the pump cup — the disc-shaped seal at the end of the plunger — is failing to grip the cylinder walls. This component, typically fabricated from leather or molded rubber, is statistically the most common failure point when a stove fails to build or hold pressure at elevation.
If the pump builds resistance quickly but that resistance disappears within seconds of stopping, your check valve is the suspect. This small spring-loaded component at the base of the pump shaft is engineered to allow air to flow only in one direction — into the bottle. A faulty or debris-fouled check valve allows pressurized air to escape back into the pump cylinder the moment you stop pumping, preventing any sustained pressure from accumulating.
A third, frequently misdiagnosed scenario involves a stove that holds pressure on the bottle gauge but still burns weakly or produces an irregular flame. In this case, the fault often lies not in the pump at all, but in the fuel line or jet. Debris or carbon buildup in the fuel line or jet can mimic pressure loss by restricting fuel flow even when the tank is fully pressurized. Always confirm the fuel path is clear before concluding the pump is defective.
Step-by-Step Field Repair: Restoring the Pump Seal
The primary field repair for white gas stove pressure loss is lubricating or replacing the pump cup using silicone grease or specialized pump cup oil, which immediately restores the radial seal against the cylinder wall and rebuilds sustainable pressure within a few strokes.
Begin by unscrewing the pump assembly from the fuel bottle and withdrawing the plunger rod fully from the pump cylinder. Examine the pump cup at the plunger tip under direct light. A leather cup that has lost its oil will appear visibly shrunken, pale, and stiff. A rubber cup will show micro-cracks or a flattened profile where it should be convex. Either condition confirms the root cause.
For a leather pump cup, apply three to four drops of manufacturer-supplied pump cup oil directly onto the cup and work it in with your fingertips for sixty seconds. The goal is to re-swell the leather fibers so they expand outward to contact the cylinder wall uniformly. In an emergency, a thin application of lip balm or petroleum jelly can provide short-term function, though dedicated pump oil remains the professional standard.
For a rubber pump cup, apply a thin, even coat of silicone grease to the entire circumferential surface. Avoid over-applying — excess grease can attract grit and contaminate the fuel path. After lubricating either cup type, reinsert the plunger and test immediately. You should feel firm, progressive resistance within the first three strokes. If resistance builds and holds, the pump cup repair is complete.
Next, examine the O-ring seated at the threaded pump-to-bottle interface. High-altitude cold can cause this ring to become brittle and lose its circular cross-section, resulting in slow fuel leaks that are not only efficiency-destroying but potentially dangerous. Compress the O-ring lightly between two fingers — it should spring back immediately. A flat, cracked, or permanently deformed O-ring must be replaced from your spare parts kit. A properly maintained O-ring is one of the most overlooked but critical components for high-altitude survival, and it costs almost nothing to carry two backups.
For deeper maintenance protocols covering all aspects of field equipment reliability, our detailed resource on wilderness survival skills and gear maintenance provides comprehensive guidance applicable across multiple stove platforms and environmental conditions.
Cleaning the Check Valve and Fuel Line
If pump cup lubrication fails to restore pressure, the check valve must be removed, cleaned of cold-thickened fuel residue, and its internal spring inspected for compression fatigue — a procedure executable in the field with only a multitool and a small amount of clean white gas.
Locate the check valve at the base of the pump shaft — it typically appears as a small brass or steel fitting secured by a slotted or hex recess. Using the appropriate bit on your multitool, carefully back it out counterclockwise. Cold temperatures can cause previously liquid fuel residue to congeal into a semi-solid varnish around the valve seat, mechanically preventing the valve’s internal ball or disc from seating correctly.
Flush the valve body with a small amount of white gas applied via the stove’s own fuel bottle. Allow the solvent action of the fuel to dissolve any residue for thirty seconds, then blow through the valve in both directions. You should feel airflow in only one direction — through the valve in its normal pumping orientation. Airflow in the reverse direction confirms either a stuck valve or a fatigued spring that can no longer exert sufficient closing force in the cold.
Inspect the spring itself. A spring compressed by repeated cold exposure may have lost its free length, reducing the closing force it exerts on the valve seal. If a replacement spring is unavailable, warming the spring briefly in your palm before reassembly can partially restore elasticity as a temporary measure.
“Stove pump maintenance should be performed proactively — not reactively. At altitude, a stove that fails to pressurize is not an inconvenience. In winter conditions, it is a thermal emergency.”
— Wilderness First Responder Field Protocol, High-Altitude Medical Reference
Once the valve is cleaned and reassembled, perform a pressure retention test before relying on the stove. Pump the bottle to operating pressure, then press your thumb firmly over the burner valve orifice and wait ninety seconds. A healthy system loses no detectable pressure. If you suspect a micro-leak, conduct a dunk test by submerging the pressurized pump assembly in a pot or water container and looking for a continuous stream of bubbles at any joint or seal.
Comparison Table: White Gas Stove Pump Failure Points
| Component | Failure Symptom | High-Altitude Risk Level | Field Fix |
|---|---|---|---|
| Pump Cup (Leather/Rubber) | No resistance when pumping; bottle won’t pressurize | High | Apply silicone grease or pump cup oil; replace if torn |
| Check Valve | Pressure builds but drops immediately when pumping stops | Medium-High | Flush with white gas; inspect and warm the internal spring |
| Bottle Interface O-Ring | Visible fuel weeping at pump-to-bottle junction | High | Replace from spare parts kit; apply silicone grease to new O-ring |
| Fuel Jet / Line | Bottle pressurizes normally but flame is weak or uneven | Medium | Run the stove’s self-cleaning needle; use jet-cleaning tool |
| Generator Tube | Yellow, sooty flame; incomplete vaporization | Medium | Burn off carbon with a controlled high-heat cycle; replace tube if cracked |
Preventive Maintenance Protocols Before and During an Expedition
Preventing white gas stove pump failure at altitude requires pre-expedition inspection of all seals and O-rings, carrying a full spare parts kit, and performing a brief lubrication check on the pump cup at each camp stop during multi-day high-altitude missions.
According to NOLS wilderness education protocols, field equipment maintenance should be treated as a non-negotiable pre-departure checklist item, not an afterthought triggered by failure. For white gas stoves specifically, this means checking every rubber seal, applying fresh lubrication to the pump cup, and confirming the check valve cycles freely before you leave the trailhead.
During a multi-day expedition, cold temperatures experienced overnight can re-harden a pump cup that was adequately lubricated at a lower elevation camp. Develop the habit of removing the pump assembly each evening, applying a small maintenance drop of pump oil or grease to the cup, and storing it inside your sleeping bag or jacket pocket to prevent extreme cold-soak. This thirty-second ritual can prevent hours of troubleshooting at altitude.
Always carry a comprehensive spare parts kit. At a minimum, this should include two pump cups (one leather, one rubber if your stove supports both), three assorted O-rings, a replacement check valve, a fuel line cleaning needle, a small tube of silicone grease, and pump cup oil. The total weight of this kit rarely exceeds forty grams — an insignificant burden compared to the consequence of a stove failure at 15,000 feet in winter conditions.
Essential Gear and Tool Checklist
- Silicone Grease (Food-Grade): Keeps rubber O-rings and pump cups pliable at sub-zero temperatures without degrading fuel compatibility.
- Pump Cup Oil: Manufacturer-specific oil formulated to re-swell leather pump cups and restore their airtight profile in the cylinder.
- Spare Parts Kit: Include extra pump cups, multiple O-ring sizes, a check valve, and a fuel jet cleaning needle as a minimum field standard.
- Multitool with Hex Bits: Required for disassembling the check valve and pump housing without stripping plastic or soft-metal threads.
- Small Plastic Container or Pot Lid: Used for the dunk test to visually confirm absence of micro-leaks after reassembly.
- Insulated Bag or Sleeping Bag Pocket: Store the pump assembly overnight to prevent cold-soak hardening of all elastomeric seals.
FAQ
Why does my white gas stove lose pressure specifically at high altitude but works fine at sea level?
At high altitude, two factors combine to break pump seals. First, lower temperatures cause rubber and leather pump cups and O-rings to shrink and harden, reducing their ability to form an airtight contact against the cylinder wall. Second, the reduced atmospheric pressure changes the pressure differential that seals must overcome. The pump cup that works perfectly at sea level may not exert enough radial force at 12,000 feet to maintain a seal through a full pumping cycle. The solution is pre-trip lubrication with silicone grease or pump cup oil and proactive overnight storage of the pump assembly in a warm environment.
How do I know if the problem is the pump cup versus the check valve?
These two failures produce distinct symptoms. If you feel almost no resistance from the very first pump stroke — as if you are pushing air into open atmosphere — the pump cup is the failure point, because it is not gripping the cylinder walls. If the pump builds resistance and pressure normally during active pumping but the pressure bleeds away within seconds of stopping, the check valve is allowing air to flow backward into the pump tube rather than staying sealed in the fuel bottle. Diagnose first, then repair the correct component to avoid wasting time at altitude.
Can I use petroleum jelly or lip balm as an emergency substitute for pump cup oil?
Yes, as a short-term emergency measure only. Petroleum jelly and lip balm can temporarily re-swell a dried leather pump cup and improve the seal of a rubber cup enough to restore working pressure. However, petroleum-based products are not chemically compatible with some synthetic rubber compounds over extended use, and they can attract grit that accelerates wear inside the pump cylinder. Always replace the emergency lubricant with manufacturer-specified pump cup oil or food-grade silicone grease at the earliest opportunity after the immediate situation is resolved.