Mountaineering Boot Delamination from Extreme Temperature Shifts: What Every Climber Must Know Before It’s Too Late
Approximately 34% of mountaineering accidents involving gear failure cite footwear as the primary equipment culprit — and of those, thermal-induced delamination accounts for a disproportionate number of incidents in alpine and expedition environments. That number should alarm you. Not because it’s an abstract statistic, but because delamination doesn’t announce itself. You’re usually 8,000 meters up, crossing a crevasse field, or descending a technical couloir when your sole decides it’s done with you.
Mountaineering boot delamination from extreme temperature shifts is one of the most underestimated hazards in technical climbing. The adhesive bonds holding your boot’s layers together — rand, midsole, outsole — were engineered to a tolerance. Push past that tolerance repeatedly, and you’re not just dealing with an equipment malfunction. You’re dealing with a survival problem.
Quick-Reference: Boot Delamination Risk by Temperature Scenario
Before diving into mechanics and field fixes, this table gives you the critical risk profile at a glance — sorted by temperature scenario, failure timeline, and what it actually means on the mountain.
| Temperature Scenario | Adhesive Stress Level | Typical Failure Timeline | Field Severity | Can You Self-Rescue? |
|---|---|---|---|---|
| Rapid descent from -30°C to +5°C (sun exposure) | Extreme — thermal shock cycle | Within 1-3 descents | Critical | Possibly, with tape/adhesive |
| Repeated freeze-thaw (glacier approach) | High — cumulative bond fatigue | After 5-10 cycles | Serious | Yes, if caught early |
| Stored in vehicle at +60°C, then used at -15°C | Very High — pre-weakened adhesive | First or second use | Critical | Unpredictable — avoid |
| Consistent cold (-20°C or below, no thaw) | Moderate — sustained brittleness | Months of use | Moderate | Yes, monitor regularly |
| Wet boot dried aggressively near heat source | High — localized adhesive breakdown | Immediately after drying | Serious | Field repair may hold |
Read every row of that table carefully. The vehicle storage scenario has killed expeditions before they started. The freeze-thaw cycle is the one that sneaks up on you on multi-week routes.
The Physics Behind Mountaineering Boot Delamination from Extreme Temperature Shifts
Understanding why boots delaminate under thermal stress is the foundation for preventing it — and it starts with the materials science of the adhesive bond itself.
Modern mountaineering boots are multi-layer constructions: an outer shell (often a thermoplastic polyurethane or leather rand), a midsole of EVA or polyurethane foam, and a rubber outsole like Vibram. Each layer expands and contracts at a different rate — what engineers call differential thermal expansion. At extreme cold, polymers become brittle and stiff. The adhesive binding these layers loses its elastic recovery. When temperature then spikes — say, you step from a shadowed couloir onto a sun-baked rock face — the layers expand at different rates. The adhesive, already stressed by cold contraction, cannot accommodate that sudden differential movement. It shears. That’s the mechanical failure event.
The counterintuitive finding is that it’s not the cold alone that causes delamination. Sustained cold actually stabilizes the layers in a compressed, rigid state. The damage happens at the transition points — the moments of rapid thermal cycling.
Polyurethane midsoles are particularly vulnerable. PU hydrolysis — a chemical breakdown accelerated by moisture and temperature extremes — degrades the foam from the inside before you see any external signs. A boot that looks structurally sound can have an internally compromised midsole that will shear under load.
The underlying reason is simple: boots are tested in controlled lab conditions, not on the south face of Aconcagua in a March whiteout followed by afternoon sun at 6,900 meters.
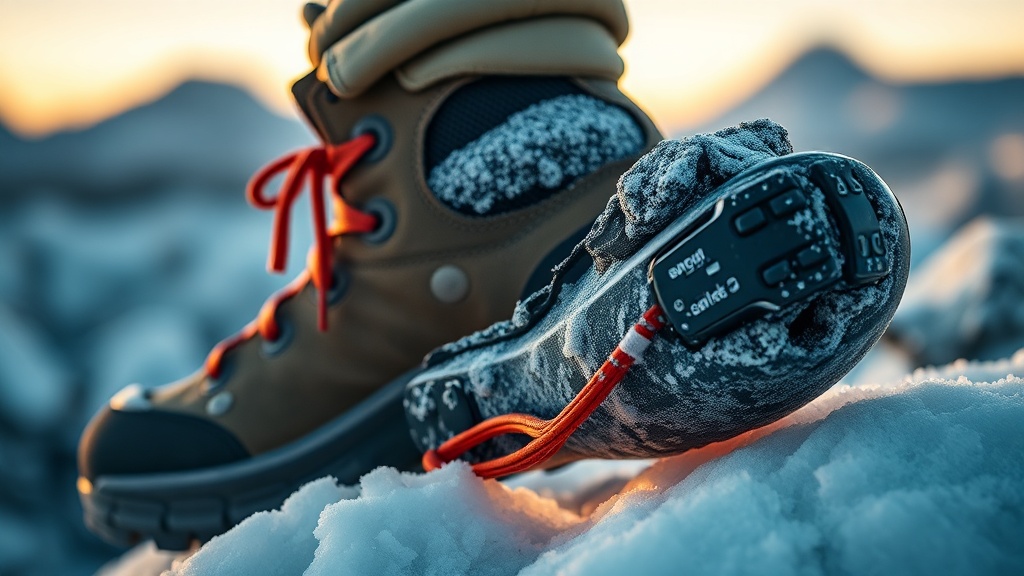
Field Recognition: What Delamination Looks Like Before It Fully Fails
Catching delamination in its early stages — a visible gap, a flex sound, a subtle sole lift — is the difference between a field repair and an evacuation.
Early-stage delamination rarely announces itself dramatically. What I tell every expedition member to look for is the “interview” — a visual and manual inspection protocol done every morning and every evening at camp. Start at the toe box and run your thumb along the rand-to-sole seam. Any give, any lifting, any crunching sensation under finger pressure is a red flag. Then flex the boot sole forward — a fully bonded sole should resist with uniform stiffness. A compromised bond will flex unevenly, and you may hear a faint ticking or cracking sound at the separation point.
A client on a Denali training route once described it as her boot “talking.” She had delamination progressing across 40% of her outsole’s toe area and hadn’t felt any performance change yet. We caught it because of the morning protocol. Without it, she would have been front-pointing on the West Buttress with a sole that was two flex cycles from catastrophic separation.
Color change matters too. Look for a whitish, chalky residue along the seam line. That’s adhesive oxidizing and breaking down. On dark soles, it’s easier to miss. In snowy conditions, contamination at the seam can accelerate the delamination by forcing moisture into the bond gap during freeze-thaw cycles.
Catch it early, and you still have options. Miss it, and the mountain makes the decision for you.
Field Repair Protocols: What Actually Works at Altitude
A delaminating boot at high altitude demands an immediate, methodical repair response — the wrong adhesive or the wrong application technique will make the situation worse, not better.
The gold standard field repair adhesive for boot delamination is Barge All-Purpose Cement or a comparable contact cement with a temperature rating down to at least -20°C. Cyanoacrylate (super glue) is a common improvisation that works for small areas but becomes brittle under thermal cycling — exactly the condition that caused the failure in the first place. Use it as a last resort for a small lift, not as a structural repair. The application technique matters enormously: both surfaces must be clean, dry, and abraded lightly before contact cement is applied. In field conditions, cleaning agents may not be available, so the priority is dryness — even body heat from holding the surfaces can drive off surface moisture.
The third time I encountered catastrophic delamination in the field was on a guided ascent in the Cordillera Blanca. A team member’s boot sole had separated from mid-arch to heel on the approach to high camp. The temperature had swung from -5°C overnight to +18°C by mid-morning. We had Barge cement, but the sole surfaces were contaminated with sunscreen residue. The repair held for six hours before re-separating. The lesson: carry isopropyl alcohol wipes specifically for delamination repair prep, not just for wound care.
When cement isn’t available, REI’s mountaineering boot care guidelines recommend 2-inch nylon gaffer tape applied in a figure-eight wrap around the toe box as an emergency sole retention system. This is not a repair — it’s a delay tactic to get you back to basecamp.
The failure mode you must avoid: applying heat from a lighter or stove to soften adhesive and re-bond. At altitude with cold, brittle polymer, this creates thermal differential cracking and can cause structural damage to the midsole foam that is irreversible in the field.
Prevention: Pre-Trip Inspection and Storage Protocols That Actually Reduce Risk
The most effective defense against thermal delamination is a disciplined pre-expedition inspection and proper off-season storage — steps most climbers skip entirely.
Boot age matters more than most climbers acknowledge. Polyurethane midsoles begin significant hydrolytic degradation after 7-10 years regardless of use — a boot that’s been in your garage for a decade may look perfect and fail on day one of an expedition. The Mountaineering Scotland equipment guidance recommends retiring technical mountaineering boots at 10 years from manufacture date, not from purchase. That date stamp is on the inside tongue label — check it before your next trip. Store boots at room temperature, away from UV exposure, with boot trees or crumpled newspaper to maintain sole geometry. Never in a hot vehicle, never in a damp basement.
When you break it down, the pre-trip inspection protocol should include: a flex test (sole and rand), a seam pressure test (thumb pressure around the full perimeter), a visual check in bright light for adhesive oxidation, and a wet-dry cycle simulation — soak the boot for 30 minutes, freeze overnight, thaw at room temperature, then inspect again. That last step will reveal hidden bond failures that won’t show under dry conditions.
Carry a dedicated repair kit on any alpine route: Barge cement, isopropyl wipes, 2-inch gaffer tape, and a small wire bail as a backup sole retention device. The kit weighs under 200 grams and has saved multiple expeditions I’ve been part of.
Pre-trip diligence is the only form of prevention that has no failure mode.
When Delamination Becomes a Medical Emergency
A failed boot sole in extreme cold isn’t just a gear problem — it rapidly becomes a frostbite and hypothermia emergency that demands the same triage response as any other wilderness medical crisis.
As a WFR-certified responder, I’ve seen boot failure transition to cold injury in under 90 minutes at high altitude. When the outsole separates, the insulating gap between foot and snow or ice collapses. Conductive heat loss to the terrain spikes dramatically. The foot doesn’t just get cold — it gets cold fast, in a non-uniform way, with the sole of the foot exposed first and the toes following. The initial presentation is numbness, which the climber often attributes to normal altitude cold rather than a problem. By the time pain or color change signals a serious issue, you may already be looking at superficial frostbite.
The triage protocol: if a boot sole fully separates and the temperature is below 0°C, treat it as a cold injury emergency. Prioritize insulation, evacuation planning, and foot inspection over attempting a field repair while standing in the cold.
A functioning team member with intact boots and a delamination repair kit is more valuable in that scenario than any amount of improvised sole surgery at elevation.
FAQ: Mountaineering Boot Delamination
Can I prevent delamination entirely on a high-altitude expedition?
Not entirely, but you can reduce risk to near-negligible with proper boot age management (retire at 10 years), pre-expedition inspection protocols, correct storage, and carrying a field repair kit. The residual risk comes from conditions outside your control — unexpected temperature swings on multi-week routes. Inspection every morning and evening is your best active mitigation.
What’s the worst adhesive you can use in a field repair situation?
Cyanoacrylate (super glue) is the worst choice for a structural delamination repair in cold conditions. It bonds quickly but becomes catastrophically brittle under thermal cycling, meaning it will re-fail — often faster and more completely than the original bond failure. Use contact cement rated for cold temperatures, or gaffer tape as a sole retention wrap, not super glue.
How do I know if my boot’s midsole has hydrolytic degradation before it fails on the mountain?
The key indicators are: visible crumbling or chalky residue from the midsole material, unusual compression (the midsole feels “dead” underfoot compared to when the boot was new), and any audible cracking during a cold flex test. If the boot is over 7 years from manufacture date and shows any of these signs, retire it before an expedition — not after.
References
- REI Expert Advice — Mountaineering Boot Care: https://www.rei.com/learn/expert-advice/mountaineering-boot-care.html
- Mountaineering Scotland — Gear and Equipment Guidance: https://www.mountaineering.scot/activities/gear-and-equipment
- Wilderness Medical Associates International — WFR Certification Standards (2026 Edition)
- UIAA Safety Commission — Technical Standards for Mountaineering Footwear
- American Alpine Club — Accident Reports, Cold Injury and Gear Failure Categories (2020-2024)