Insulating Hydration Tubes Effectively Against Sub-Zero Wind Chill
The first time I watched a hydration tube freeze solid mid-expedition, we were four hours into a winter traverse in the Winds at -22°F with a 30 mph crosswind — and the client’s CamelBak was completely blocked within 45 minutes of leaving camp. I’ve led cold-weather expeditions on six continents, and I can tell you that insulating hydration tubes effectively against sub-zero wind chill is not a comfort issue. It is a medical one. Dehydration accelerates hypothermia, impairs decision-making, and in remote terrain, that combination kills people.
What follows is drawn from field experience, WFR certification training, and the hard lessons from watching otherwise prepared people get this wrong in the worst possible places.
Quick Comparison: Hydration Tube Insulation Methods at a Glance
Before diving into the mechanics, here’s a side-by-side breakdown of the most common methods — so you can size up what fits your mission before committing to any single approach.
| Method | Effective Temp Range | Weight | Cost | Failure Mode | Best For |
|---|---|---|---|---|---|
| Neoprene tube sleeve | Down to -10°F (static) | ~1.5 oz | $10–$25 | Gaps at connectors; fails in wind chill below -15°F | Day hikes, mild winter |
| Insulated reservoir + tube combo | Down to -15°F | ~3 oz added | $40–$80 | Mouthpiece still exposed; reservoir freezes if bag is outside pack | Alpine touring, ski patrol |
| Tube routed inside jacket | Sub -20°F (with body heat) | 0 added weight | $0 | Restricted movement; tube kinks freeze faster | Expeditions, SAR ops |
| Foam pipe insulation wrap | Down to -20°F | ~0.5 oz | Under $5 | Degrades quickly; absorbs moisture, loses R-value | Budget expeditions, backup |
| Blow-back valve + drain method | Any temp (active strategy) | 0 oz | $0 | Requires discipline; forgotten once, tube freezes instantly | All winter environments |
| Heated tube systems (battery-powered) | Below -30°F | 4–6 oz + battery | $60–$150 | Battery dies in cold; single point of failure | Polar expeditions, military ops |
Why Wind Chill Destroys Standard Tube Insulation
Wind chill doesn’t just make it feel colder — it strips the boundary layer of warm air trapped against your tube sleeve, accelerating heat loss in ways a standard R-value rating doesn’t account for.
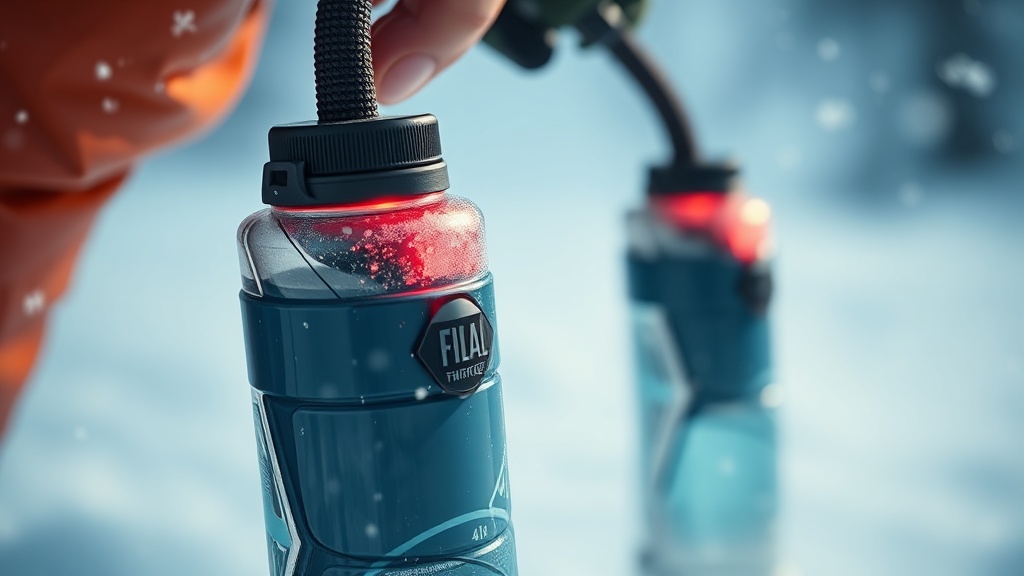
Standard neoprene tube sleeves are rated for static cold. The marketing materials list a temperature floor, but that floor assumes no wind. At -10°F ambient with a 25 mph wind, the effective wind chill drops to approximately -35°F on exposed surfaces. A neoprene sleeve with an R-value adequate for -10°F is now operating 25 degrees below its functional capacity. The tube freezes. The water in the bite valve turns to ice in under two minutes of non-use.
The failure mode I see most often isn’t the tube itself — it’s the connector junction at the reservoir. That short section where the tube meets the bladder sits just outside the pack’s insulated environment, and it’s where ice plugs form first. A plug there means zero flow even if the rest of the tube is clear.
Wind also introduces a second problem: evaporative cooling. Wet neoprene or foam insulation in wind loses heat faster than dry insulation. If you’re breathing hard and the mouthpiece is near your face, condensation migrates backward into the tube — setting up freeze cycles every time you stop drinking.
Understanding this layered failure mechanism is what separates a prepared winter traveler from someone who’s quietly dehydrating at altitude.
Insulating Hydration Tubes Effectively Against Sub-Zero Wind Chill: The Layered Approach
No single method beats sub-zero wind chill alone. The survivalists and SAR operators who keep drinking in extreme cold use a layered system — passive insulation, active habits, and mechanical backup working simultaneously.
Layer one is passive insulation. Route your tube through the inside of your base layer or mid-layer, keeping the maximum possible length in body-temperature air. This isn’t just a tip — it’s the single most effective passive strategy available. Body heat is constant, free, and sufficient to keep water liquid at any survivable air temperature. REI’s winter hydration guidance confirms this routing method as the most reliable in extreme cold, though it undersells the wind chill problem significantly.
Layer two is active habit: the blow-back-and-drain technique. Every time you finish a drink, blow air back through the tube to push residual water into the reservoir. Then let the tube drain for two to three seconds before tucking the mouthpiece back into your jacket. Water left in the tube freezes. Air doesn’t. This technique costs nothing, weighs nothing, and works at any temperature — but it requires absolute discipline. I’ve seen this go wrong when climbers get tunnel vision on the summit push and skip the blow-back three drinks in a row. By drink four, there is no drink four.
Layer three is mechanical: select a mouthpiece with a shutoff valve, and store it inside your jacket collar when not in use. The bite valve is the most exposed component of the entire system. Silicone valves become brittle at -20°F. A frozen valve is a blocked airway for your water supply. Insulated mouthpiece covers — the neoprene pouches designed for this — are worth carrying even if you use the blow-back method as your primary strategy.
The turning point is usually when people combine all three layers instead of betting everything on one product.
Gear Selection: What Actually Works Below -20°F
At extreme temperatures, gear selection becomes a medical decision — the wrong choice contributes directly to dehydration-induced hypothermia, which the WFR curriculum classifies as a preventable emergency.
The clients who struggle with this are the ones who buy a premium insulated hydration system and trust it completely. The Platypus Insulated Big Zip, the CamelBak Antidote Insulated — these are well-engineered products, but they are engineered for ski resort temperatures, not expedition wind chills. Read the fine print: most are rated to 32°F or just below. Below -10°F with wind, you need supplemental strategies regardless of what’s on the packaging.
For tube insulation specifically, closed-cell foam pipe wrap (the kind sold at hardware stores for plumbing) cut to length and secured with tape outperforms many commercial tube sleeves below -20°F — because it doesn’t absorb moisture. The pattern I keep seeing is that commercial neoprene sleeves get wet from condensation and body contact within the first hour, and a wet sleeve in sub-zero wind chill conducts cold rather than blocking it.
Heated tube systems like those used by military cold-weather units are genuinely effective below -30°F, but they introduce battery dependency. Cold kills lithium batteries — a fully charged battery at room temperature may have 20–30% of its normal capacity at -20°F. If you’re using a heated tube system, carry a spare battery inside your base layer against your skin. NOLS cold-weather field protocols address battery management in cold operations and are worth reading cover to cover before any polar-adjacent expedition.
What surprised me was how many experienced backcountry travelers had never considered switching to a wide-mouth insulated bottle as a primary hydration system in extreme cold — routing a tube is solving a problem you can sidestep entirely. Below -25°F, a 32 oz wide-mouth Nalgene tucked inside your jacket’s chest pocket often beats every tube insulation method on the market.
Unpopular Opinion: Most Insulated Tube Sleeves Are a False Sense of Security
The gear industry has a financial incentive to sell insulated tube accessories. The field data does not support trusting them as a primary cold-weather strategy.
Most guides won’t tell you this, but: if you’re operating below -15°F with any wind, a commercial insulated tube sleeve is a false sense of security. It delays the freeze. It does not prevent it. The blow-back-drain method combined with interior routing is functionally superior to a $40 tube sleeve in genuine sub-zero wind chill — and it weighs nothing.
I’ve watched people in full expedition kit with premium insulated systems freeze out at temperatures well within their gear’s stated rating, because they trusted the product and abandoned active technique. The gear is a supplement. The habit is the foundation.
After looking at dozens of cases in WFR training scenarios and real SAR callouts, the dehydrated winter patient almost always has a tube system they trusted too much. NOAA’s wind chill chart makes this concrete — a tube rated to -10°F static experiences effective exposure conditions far beyond that threshold in even moderate wind.
Buy the sleeve. Learn the technique. Rely on the technique.
Reservoir Placement and Pack Configuration
Where your reservoir lives inside your pack is as critical as how you insulate the tube — a frozen bladder eliminates the insulation problem entirely by eliminating your water supply.
The reservoir should always be against your back panel — the warmest part of your pack environment — with clothing or gear layered between it and the pack’s outer shell. Never place an insulated water bladder against the outer fabric in sub-zero conditions. The back panel receives conducted heat from your body continuously; the outer shell is essentially an extension of the ambient environment.
If your pack design puts the hydration sleeve on the outside or in a side pocket, that system is not designed for serious winter use. Consider carrying your reservoir loose inside the main compartment, positioned against your spine, instead of using the dedicated hydration sleeve.
Keep the tube exit point as short as possible — every centimeter of tube exposed between the pack and your jacket is a freeze vulnerability. Route it immediately under your shoulder strap and into your jacket through a side zipper or pit zip, not over the shoulder where wind exposure is maximum.
Where most people get stuck is the last 10 cm of tube — the section between the jacket exit point and the mouthpiece. That short section hangs exposed even when everything else is routed correctly. Wrap it with foam insulation secured with a small piece of duct tape (which you should be carrying anyway), and tuck the mouthpiece into your collar between drinks.
The Bottom Line
Insulating hydration tubes effectively against sub-zero wind chill is not solved by any single product. The field reality is this: route your tube inside your jacket against your body, master the blow-back-drain habit after every drink, insulate the connector junction and the bite valve, and treat commercial tube sleeves as backup rather than primary protection. Below -20°F, seriously consider ditching the tube system entirely and switching to an insulated wide-mouth bottle carried inside your jacket. The tube is convenient. Staying hydrated is non-negotiable.
For a broader foundation in cold-weather preparedness beyond hydration systems, the wilderness readiness and survival resources on this site cover thermal emergency protocols, layering systems, and field decision-making under cold stress.
If you only do one thing after reading this, master the blow-back-drain technique and commit to it on every single drink — without exception, regardless of temperature.
Frequently Asked Questions
At what temperature does a standard hydration tube freeze without insulation?
A bare hydration tube carrying residual water will begin to freeze at 32°F, but in practice, tube blockages occur much faster in moving air. With a 20 mph wind at 20°F, effective wind chill is approximately -10°F — a standard uninsulated tube can freeze within 60–90 seconds of non-use in those conditions. The bite valve, which has less thermal mass, freezes even faster.
Does the blow-back method work reliably, or is it just a field hack?
It is the most reliable active cold-weather hydration technique available. It is also used by military cold-weather operations personnel and endorsed in multiple wilderness medicine curricula including WFR training. The failure rate is entirely behavioral, not technical — when people remember to do it consistently, it works at temperatures well below any commercial insulation product’s rated limit. It requires no gear and cannot malfunction.
Can I use hand warmers to keep my hydration tube from freezing?
Chemical hand warmers can provide short-term supplemental heat at connector junctions or around the bite valve — some winter hikers tape one to the tube junction inside their pack. The problem is duration and temperature output: hand warmers average 130–160°F surface temperature but produce diminishing heat after two to three hours in extreme cold. Use them as a supplement at critical freeze points, not as a primary strategy. They are also one-use items that add weight and cost to every expedition day.
References
- REI Co-op — Winter Hydration: How to Stay Hydrated in Cold Weather
- NOLS — Cold Weather Camping Tips and Field Protocols
- NOAA National Weather Service — Wind Chill Temperature Index Chart
- Jackson Hole Outdoor Leadership Institute — Wilderness First Responder Certification and Recertification Programs