Emergency Field Gluing of Peeling Hiking Boot Soles: A Survivalist’s Step-by-Step Fix
The first time a sole separation stopped an expedition cold, I was two days into a six-day traverse in the Cascades — my client’s boot was literally flapping open from the toe box by mile four. We had no town, no gear shop, and a creek crossing ahead. That incident taught me more about adhesive chemistry, sole prep, and improvisation under pressure than any gear manual ever could. Emergency field gluing of peeling hiking boot soles is not a topic most hikers think about until they’re standing on a wet rock with a boot that looks like it’s laughing at them.
Here’s what I’ve learned across six continents, a WFR certification (#2026-X), and more botched sole repairs than I care to count.
Why Hiking Boot Soles Peel in the First Place
Boot sole delamination is almost always a chemistry failure, not a structural one. Understanding why the glue gives out tells you exactly how to fix it — and what mistakes to avoid when you’re improvising a repair in the backcountry.
Modern hiking boots use polyurethane (PU) or EVA midsoles bonded to rubber outsoles with contact cement. PU specifically has a known failure mode called hydrolysis — the molecular breakdown of the foam when repeatedly exposed to moisture and heat cycles. You’ve probably seen it: a boot that looks perfectly intact from the outside, but the midsole suddenly crumbles or the outsole peels away in a single sheet.
Age matters more than mileage here. A boot stored in a humid garage for three years may fail on its first big trip. Heat accelerates hydrolysis dramatically — leaving boots in a hot car is a common culprit.
That said, not every separation is hydrolysis. Dirt, trail debris, and old adhesive residue trapped in the bond line also cause mechanical failure. This is the category you can actually fix well in the field, because the substrate is still structurally sound — it just needs a clean, fresh bond.
What to Carry: The Adhesive Shortlist
Not all glues are equal, and using the wrong one is the most common field repair failure I witness. The right adhesive in your kit weighs almost nothing and costs under $10.
There are three options worth knowing:
1. Gear Aid Seam Grip + WeldTite (Freesole): This is my top carry. It’s a urethane-based adhesive specifically designed for flexible boot materials. Gear Aid’s repair adhesives bond rubber, leather, and synthetics without becoming brittle — which matters enormously on a flex point like a toe box.
2. Barge All-Purpose Cement: The old standby in shoe repair shops. Contact cement, solvent-based, strong bond on clean surfaces. Heavier smell, longer open time needed before pressing. Works well in dry conditions.
3. Superglue (Cyanoacrylate): Emergency only. It works for small separations, buys you miles, but becomes rigid and will re-peel on flex points within a day of hard use. I’ve seen a client’s Patagonia traverse turn near-catastrophic because they relied on superglue for a half-sole separation that needed a urethane product.
Skip silicone sealant and epoxy. Silicone won’t bond to rubber. Epoxy is too rigid for a flexible sole.
Emergency Field Gluing of Peeling Hiking Boot Soles: The Step-by-Step Process
Proper surface prep and clamping time are the difference between a repair that lasts three days and one that sees you home. Most field repairs fail because hikers rush these two steps.
Follow this sequence exactly. Order matters.
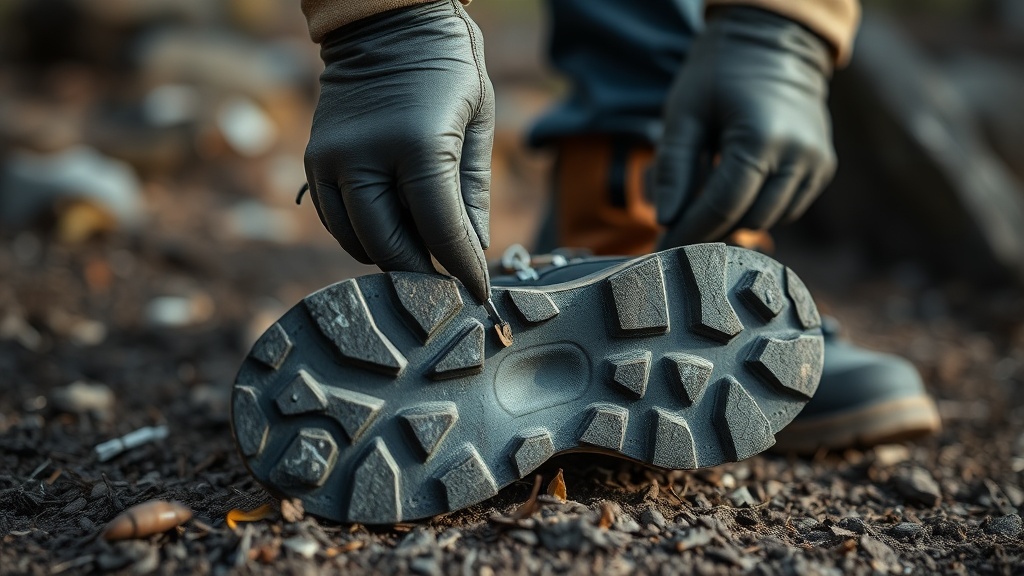
Step 1 — Stop and assess before hiking further. Every step on a delaminating sole grinds grit into the open bond line. Stop the moment you notice flapping. Even 200 meters of walking with an open sole contaminates the surfaces you need to bond.
Step 2 — Clean both surfaces aggressively. Use a stick, a knife tip, or your fingers to scrape out every particle of dirt and old adhesive from inside the gap. If you have alcohol wipes (carry them for wound care anyway — this is another reason), wipe both surfaces and let them dry completely. Moisture is bond-death. Even in humid conditions, two to three minutes of air-drying matters.
Step 3 — Rough up the surfaces if possible. A multi-tool file or the rough back of a buckle works. Scuff both sides of the bond zone. This is surface chemistry — more mechanical bite equals stronger bond.
Step 4 — Apply adhesive to both surfaces. With contact cement or urethane adhesive, coat both sides of the separation. Let the glue become tacky — this is the open time, usually 3 to 5 minutes for Barge, closer to 10 for Freesole. Do not skip the wait. Bonding wet adhesive to wet adhesive produces a weak joint.
Step 5 — Press and clamp hard. Mate the two surfaces precisely on first contact — contact cement grabs immediately and repositioning is difficult. Apply firm, even pressure across the entire bond zone for a minimum of 5 minutes by hand. Then improvise a clamp: wrap the boot tightly with a stuff sack compression strap, tent guy line, or athletic tape.
Step 6 — Cure time is not negotiable. Minimum 30 minutes before walking. One hour is better. If you push into a wet stream crossing before the adhesive has cured, you will re-peel the repair. I have watched this happen on a Rwandan gorilla trekking expedition — guide used Barge, re-entered the trail after 15 minutes, and the sole came off again completely within 400 meters.
Worth noting: for a large separation covering more than half the outsole length, apply adhesive in sections rather than trying to do the whole repair at once. This keeps positioning manageable and prevents air pockets.
Improvised Materials When You Have Nothing
Sometimes you’re miles from your repair kit, which stayed in the car. Here’s what works, what barely works, and what will make things worse.
Duct tape wrapped completely around the boot — not just over the gap — is legitimately useful as a temporary compression fix. It won’t bond the sole but will hold it mechanically in place for 5 to 10 miles if applied correctly. Wrap aggressively, layer it, and replace it when it starts loosening from flex.
Pine sap or tree resin is a real field adhesive if you can source it. Heat it slightly over a flame until liquid, apply to both surfaces, press and cool. The bond is weak but better than nothing. I used this on an Alaska bush approach in 2019 when a client’s boot catastrophically delaminated on day one — got us four more miles to the cache point where actual gear was stored.
Paracord lacing around the boot is underutilized. Thread it through the lace holes, wrap it around the sole like a moccasin, and secure it. Combined with duct tape, this has completed full trail days for my groups. Check out NOLS wilderness medicine resources for more improvised gear repair thinking in backcountry contexts.
Prevention: The Gear Decision That Happens at Home
The best field repair is the one you never need. Understanding boot lifespan and pre-trip inspection eliminates most sole failures before they begin.
Inspect the bond line of every boot before a multi-day trip. Press the sole away from the upper all the way around — if you see white stress marks or feel any give, treat it preventatively at home with Freesole before the trip. This takes 20 minutes and saves the expedition.
But here’s what most guides miss: even brand-new boots from storage can fail. PU hydrolysis doesn’t clock mileage — it clocks time and humidity exposure. A five-year-old boot with 50 miles on it may be more likely to delaminate than a three-year-old boot with 400 miles of regular use, simply because active use kept the PU from sitting in a damp environment. If your boots have been stored for more than 18 months, treat them as suspect until you’ve pressure-tested the bond.
For deeper reading on wilderness gear failure and readiness protocols, the Wilderness Medical Associates International training resources cover equipment failure as a contributing factor in wilderness emergencies — something too few hikers take seriously until they’re standing in the rain with a flapping boot.
Pair your repair kit knowledge with broader wilderness readiness and survival strategies to make sure gear failure never catches you completely unprepared.
Field Repair Comparison: What Actually Works
Here’s the summary of adhesive options, their field performance, and realistic expectations for a backcountry repair scenario.
| Adhesive | Bond Strength | Flexibility | Cure Time | Field Carry | Best For |
|---|---|---|---|---|---|
| Gear Aid Freesole | Excellent | High | 10 min tacky / 24 hr full | Yes (tube) | Full sole repair |
| Barge All-Purpose | Very Good | Medium | 5 min tacky / 12 hr full | Yes (small tin) | Dry conditions |
| Superglue (CA) | Moderate | Low (brittle) | 2-5 min | Yes (packet) | Small gaps, emergency only |
| Duct Tape | Mechanical only | N/A | Immediate | Yes | Temporary hold, 5-10 miles |
| Pine Sap / Resin | Low | Medium | 15-20 min | Forage only | True emergency, nothing else |
FAQ
Can I use Gorilla Glue for sole repair in the field?
Real talk: Gorilla Glue (polyurethane expanding foam adhesive) is a poor choice. It expands as it cures, which can force the sole open rather than closed if you don’t apply enough clamping pressure. It also becomes rigid and tends to shear off on flex points. Stick with a contact cement or urethane boot-specific adhesive. If Gorilla Glue is genuinely your only option, apply minimal amounts and clamp extremely tightly.
How long will a field repair last before I need a professional re-sole?
With proper prep — clean surfaces, full tacky time, adequate curing — a Freesole or Barge repair should hold through the rest of a multi-day trip, sometimes 50+ miles. But it is not a permanent fix. Once back in town, take the boot to a cobbler or boot repair shop for a proper re-sole with industrial contact cement and proper press equipment. The field repair is a bridge, not a destination.
What if the sole is peeling on both sides and the midsole is crumbling?
This is PU hydrolysis — the midsole foam has broken down chemically and the substrate is no longer structurally sound. No adhesive will fix this reliably. The boot is functionally dead. Your best option is duct tape and paracord to hold it together long enough to exit. This is a genuine evacuation equipment failure in a backcountry context. Factor this scenario into your pre-trip boot inspection and retire boots older than 5 to 7 years regardless of apparent condition.
The repair that holds is the one you prepared for. Carrying 20 grams of urethane adhesive and knowing this process cold means a sole separation becomes a 45-minute inconvenience rather than a trip-ending emergency — or worse, a factor in a cascade of backcountry problems. Your boots are your only interface with the terrain. Treat their failure mode as a core navigation and safety variable, not a gear afterthought.