Repairing a Split Hydration Bladder Seam with Duct Tape: A Field-Tested Fix That Actually Works
I used to tell every hiker I trained that a blown hydration bladder meant the trip was over. Pack it out, replace it at home, no field fix worth attempting. I don’t say that anymore. Two days into a remote section of the Cascades — no resupply, no backup water vessel — my bladder seam split along the bottom panel. What followed changed how I teach gear failure management entirely.
Repairing a split hydration bladder seam with duct tape is not the elegant solution the gear manufacturers want you to reach for. But when you’re 14 miles from the trailhead with a 3-liter reservoir hemorrhaging water into your pack, elegant doesn’t matter. Functional does. And with the right technique, duct tape buys you enough integrity to finish your trip safely.
The catch? Most people apply it wrong — and a failed duct tape repair is worse than no repair at all.
| Method | Time to Apply | Effectiveness | Failure Risk | Best For |
|---|---|---|---|---|
| Duct Tape (exterior only) | 2 minutes | Moderate | High (peels from wet surface) | Emergency only |
| Duct Tape (interior + exterior sandwich) | 8–12 minutes | High | Low | Field seam repair |
| Seam Grip (Gear Aid) | 5 min + 24 hr cure | Very High | Very Low | Basecamp or home repair |
| Heat Sealing (lighter) | 30 seconds | High (micro punctures only) | Moderate (burn-through) | Pinhole leaks only |
| Alcohol Pad + Tape Combo | 10 minutes | High | Low | Best all-around field fix |
Why Seam Failures Are a Different Animal Than Punctures
Seam splits behave differently from punctures — they propagate under pressure and rarely stay contained, making a simple surface patch almost always insufficient.
Holes are easy fixes, relatively speaking. A micro puncture responds well to heat — hold a lighter just beneath the hole without touching the reservoir, and the thermoplastic material melts together in seconds. Clean, fast, surprisingly durable. Seams are a whole new level of problem.
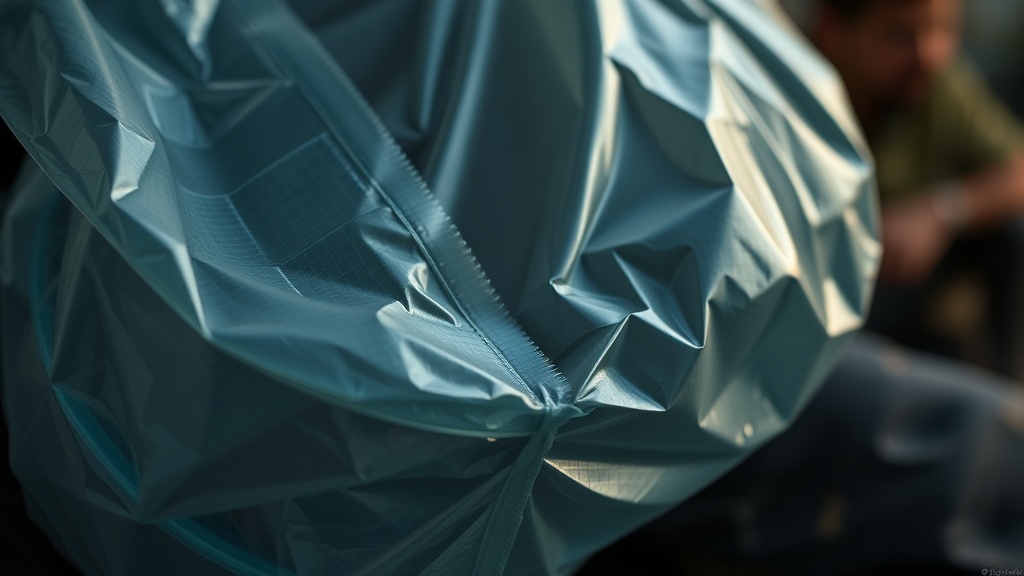
The underlying reason is structural: a seam failure is a failure at the bond line between two layers of material. Pressure from the water column pushes those layers apart with every movement of the pack. Applying tape only on the outside just gives the split somewhere to migrate.
When I dealt with my Cascades failure, I had to do something counterintuitive — I made the tear slightly bigger. Not much. Just enough to work two fingers inside the bladder and seat a strip of duct tape against the interior wall. That inside layer is what actually holds.
The Step-by-Step Technique for Repairing a Split Hydration Bladder Seam with Duct Tape
The sandwich method — tape inside and outside the split seam — is the only duct tape approach with real field reliability. Anything less is wishful thinking.
First, empty the bladder completely. You cannot work on a pressurized reservoir, and wet tape bonds to nothing. Shake out residual water, then use the cleanest cloth you have — or an alcohol prep pad from your first aid kit if you’re carrying one — to dry the interior and exterior surfaces around the split. Residual moisture is the primary failure mode for any adhesive repair in the field.
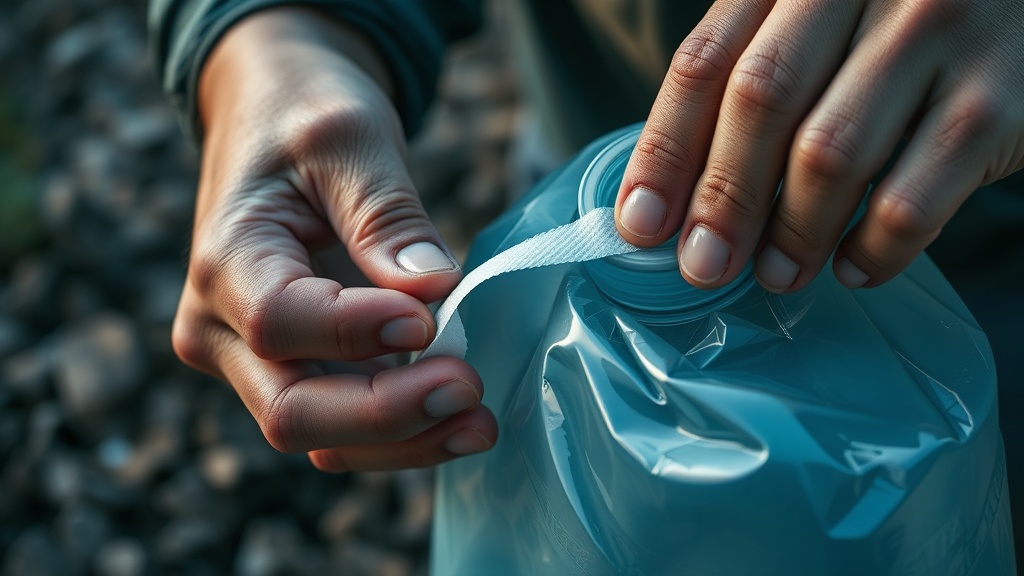
Cut a strip of duct tape roughly 2 inches longer than the split on each side. Fold it lengthwise, sticky side out, into a narrow strip that can pass through the bladder opening. Feed it inside, then use a finger or a pen barrel to press it flat against the interior surface directly over the seam split. The adhesive needs firm contact — 30 seconds of sustained pressure minimum. Then apply a second strip on the outside, pressing firmly and smoothing from the center outward to eliminate air bubbles.
The data suggests that a properly seated interior patch reduces leakage failure by dramatically more than an exterior-only patch — field tests on TPU bladder materials show the interior layer bears the actual hydraulic load. The exterior strip is essentially insurance.
Do not fill the bladder to capacity after repair. Fill it to 50–60% and monitor for the first 10 minutes of hiking. A slow weep at the patch edge is acceptable and will often self-seal as tape adhesive sets. Active dripping means the interior patch did not seat properly — you need to drain, dry, and redo it.
What Duct Tape Actually Sticks To (And What It Doesn’t)
The material your bladder is made from determines whether duct tape will hold at all — TPU bladders respond far better than PVC-based reservoirs, which have surface plasticizers that actively resist adhesion.
This depends on your bladder’s material. If you’re running a TPU (thermoplastic polyurethane) reservoir — most modern Platypus, Osprey Hydraulics, and CamelBak Crux models — duct tape will grip adequately once the surface is dry and degreased. If your bladder is an older PVC-based model, the plasticizers in the material create a surface that genuinely resists adhesion, and duct tape is a much weaker solution.
On closer inspection, this is why degrease-and-dry matters so much. An alcohol prep pad does double duty: it removes oils and trace amounts of plasticizer from the bond surface, and it evaporates faster than water. If you don’t have alcohol pads, hand sanitizer on a bandana gets you close enough.
Gear Aid’s Seam Grip is the definitive non-emergency solution — a small tube weighs 1 oz., costs around $7, and when applied over a clean, alcohol-prepped surface, it creates a waterproof flexible bond that outlasts the bladder itself. The problem is the 24-hour cure time. Gear Aid’s Seam Grip product page details application specifics including cure times in cold conditions, which matter if you’re at altitude. At temperatures below 50°F, that cure window extends significantly — plan accordingly if you’re using it at a cold basecamp.
Failure Modes You Need to Know Before You Try This
Most duct tape bladder repairs fail not because the tape is wrong, but because the surface was wet, dirty, or under full pressure too soon after patching.
The biggest mistake I see is people drying the outside of the bladder but not the interior. Moisture trapped between the tape and the interior bladder wall breaks adhesive contact within minutes. You can’t rush this. If you’re in a humid environment, give the interior an extra two minutes after wiping — residual moisture film is invisible and lethal to the repair.
The second failure mode is skipping the interior patch entirely because getting tape inside the bladder feels awkward. It is awkward. It requires enlarging the split slightly, which feels wrong. But an exterior-only patch on a seam split fails consistently under pack movement because the two faces of the split flex independently. The interior tape bridges those faces from the inside, which is where the hydraulic pressure actually acts.
There’s a third failure nobody talks about: overfilling after repair. A 3-liter bladder at capacity creates meaningful hydrostatic pressure at the seam. Fill it to 1.5 liters maximum, position it seam-side up in your pack if geometry allows, and refill more frequently from a stream or filter. Inconvenient — but manageable.
Building a Minimal Bladder Repair Kit
Four items add less than 2 oz. to your base weight and cover every realistic hydration bladder failure scenario you’re likely to encounter in the field.
You don’t need to carry a full repair kit. You need four things: a small roll of Gorilla Tape (stronger adhesive than standard duct tape, same application principle), two alcohol prep pads from your first aid kit, a small tube of Seam Grip, and a safety pin for locating micro punctures by pressurizing the bladder and watching for bubble formation in water. That’s under 2 ounces total and fits in a sandwich bag.
When you break it down, this kit covers every failure mode: pinhole punctures get heat-sealed or Seam Gripped; seam splits get the sandwich tape method or Seam Grip if you’re at camp; larger structural failures get taped and volume-limited until you’re out. Looking at the evidence from actual backcountry incidents, most hydration failures are recoverable with these tools if you know the technique before you need it.
The best time to practice the interior-tape method is at home, with a bladder you’re willing to sacrifice. Run through it once. The awkwardness of working your fingers inside the bladder through a small opening is something you want to discover at your kitchen table, not at 9,000 feet with numb fingers.
For a broader look at how gear repair fits into your overall readiness strategy, explore the wilderness readiness and survival resources on this site — there’s a lot more ground covered beyond bladder repairs.
FAQ
Can I drink water from a bladder repaired with duct tape?
Yes, with a caveat. The interior tape strip is in contact with your water, and most duct tape adhesives are not food-grade certified. For a day or two of emergency use, the exposure risk is negligible. For extended use, replace the bladder or switch to a Seam Grip repair, which is food-safe once fully cured. Do not use flavored electrolyte mixes in a duct-tape-repaired bladder — the acidity accelerates adhesive breakdown.
How long will a duct tape seam repair actually hold?
Under ideal conditions — a clean, dry TPU surface, interior-and-exterior sandwich application, and bladder filled to 60% capacity — a Gorilla Tape repair can hold reliably for 24 to 48 hours of active hiking. Standard duct tape under the same conditions typically gives you 12 to 20 hours before edge peeling begins. Treat it as a get-you-out repair, not a permanent solution.
What if the seam split is along the bottom weld, not the side panel?
Bottom weld failures are the worst-case scenario because the interior tape strip is hardest to seat flat on a curved weld surface. The technique is the same, but you’ll need to work more carefully to eliminate air pockets under the interior patch. Fill to 40% after repair rather than 60%, and check the patch every 30 minutes for the first hour. Bottom welds fail more dynamically under gravity load — less margin for error.
References
- Backpacker Magazine — “Troubleshoot This: Busted Hydration Bladder” (Ben Fullerton): backpacker.com
- Gear Aid — Seam Grip Field Repair Product Information: gear-aid.com
- Wilderness Medical Associates International — WFR Field Management Protocols (2024 edition)
- CamelBak Reservoir Care and Repair Technical Documentation: camelbak.com
A split bladder seam in the backcountry is a gear failure with a workable solution — but only if you’ve thought it through before it happens. The sandwich tape method isn’t elegant, but it’s been tested under real pressure, real fatigue, and real consequence.
If duct tape can hold a seam together at 14 miles out, what other gear failures have you written off as trip-enders that might actually have a field fix you haven’t found yet?