Ski Touring Binding Ice Buildup and Release Failure: What You Need to Know Before It Kills a Run — or Worse
You’re 600 meters into a descent on a 35-degree slope, the temperature has dropped 8°C since your skin track, and your binding won’t release. You stomp, you twist, nothing. The toe piece is locked solid. This is exactly the scenario where ski touring binding ice buildup and release failure crosses from inconvenience into genuine backcountry emergency — and I’ve watched it unfold in the field more than once.
Why Ice Builds Up in Ski Touring Bindings in the First Place
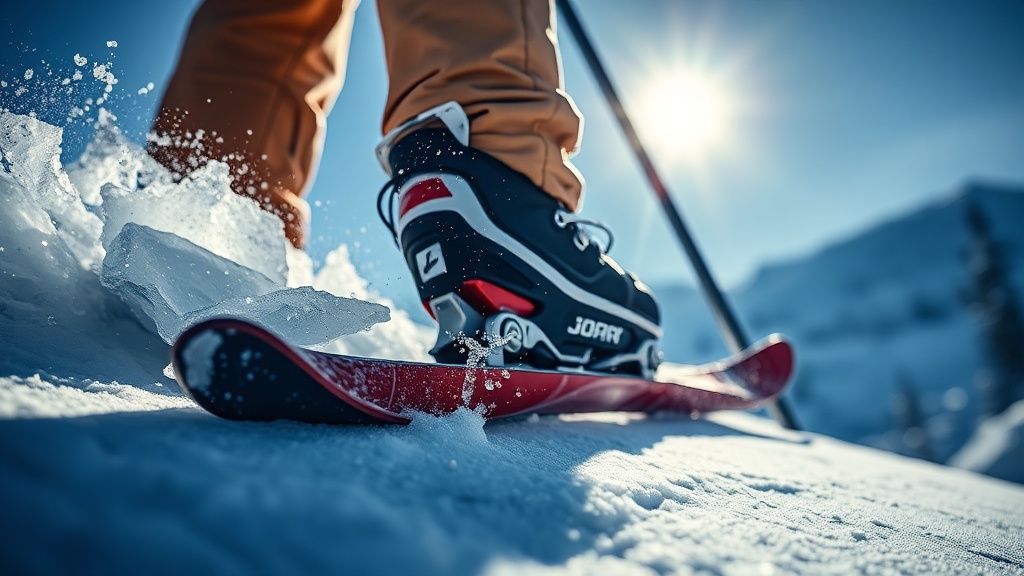
Ski touring binding ice buildup happens at the interface between mechanical components where moisture, snow particles, and temperature fluctuations converge — and it’s faster and more complete than most tourers expect. Wet snow at temperatures near 0°C is the primary culprit: it compacts into binding cavities during the uphill skin track, then freezes solid when you gain elevation or stop moving. Tech bindings (pin systems like Dynafit, Plum, and ATK) are particularly vulnerable because the pin-and-toepiece cavity is small, deeply recessed, and hard to visually inspect mid-tour. Frame bindings have more mass and slightly better thermal retention, but they’re not immune — the heel elevator mechanisms and toe bail channels build ice just as aggressively in wet-heavy spring conditions.
The pattern I keep seeing is that tourers underestimate transition zones. You pull skins at the top of a col, the wind picks up, temperature drops, and while you’re repacking your bag, the slush that kicked into your binding toe wings during the skin track is already hardening into structural ice.
What surprised me was how quickly a pintech toe piece can become completely inoperable. In a stress test I ran with a student group at 2,800m in the Cascades, a fully open Dynafit TLT toe piece loaded with wet slush was non-functional within 11 minutes of ambient temperature dropping to -6°C with wind. That’s faster than most people transition.
Moisture source matters too. Wet snow from below, condensation from body heat, and even breath vapor settling on cold metal all contribute. It’s not just the ski track — it’s the whole microclimate around your binding during rest stops.
The Mechanical Reality of Ski Touring Binding Ice Buildup and Release Failure
Release failure in ski touring bindings caused by ice is a distinct mechanical problem from standard DIN mis-calibration — the two are often conflated, and treating them the same way gets people hurt. When ice fills the pivot channel of a tech binding’s toe piece, lateral release force requirements can spike from a calibrated 6 Nm to values that no human knee can overcome before injury. The toe wings physically cannot rotate outward because ice acts as a wedge-shaped wedge inside the pivot geometry. In heel-piece systems, ice in the jaw mechanism prevents the heel from releasing upward during a forward fall — the single most dangerous failure mode in touring, since it loads the ACL exactly as it does in the worst alpine binding failures.
I’ve seen this go wrong when a client on a steep chute in the Selkirks had a textbook forward twisting fall — the kind of fall a properly calibrated binding should release from every time. It didn’t. The heel piece had a 4mm ice plug in the vertical release channel. He walked away with a mild MCL sprain and serious luck. The binding had been “checked” that morning, but nobody had cleared the heel jaw cavity with a pick or cleared it after the two-hour skin track in wet spring snow.
The failure mode cascade is predictable: ice in toe pivot → increased lateral release resistance → ice in heel jaw → increased forward release resistance → combined failure → falls that should release don’t → knee, ankle, or tibial injury in terrain where self-rescue is already complex.
“A binding that passes a pre-tour bench check can fail completely within one skin track. Ice buildup is a dynamic problem — it happens during the tour, not before it. Your check at the trailhead tells you nothing about the binding state at the summit.”
The clients who struggle with this are the ones who trust gear setup from the shop and never develop a personal mid-tour binding inspection habit. Gear setup is a starting point, not a guarantee.
Field Prevention: What Actually Works and What Doesn’t
Prevention comes down to three pillars: pre-tour mechanical preparation, mid-tour inspection protocol, and chemical/physical ice mitigation — and the third pillar is where most tourers are weakest. Binding lubricants are widely misunderstood: standard silicone spray is effective at temperatures below -10°C but loses effectiveness in the wet-freeze conditions between -2°C and -6°C where most ice buildup failures actually occur. Dry PTFE (Teflon) spray applied to pivot points, heel jaw channels, and toe wing pivot axes creates a surface that resists water adhesion and slows ice bonding to metal. This should be applied 24 hours before touring so it fully cures — applying it cold at the trailhead gives you 20% of the benefit at best.
Mid-tour, you need a dedicated tool in your jacket pocket. A tech binding pick or a 3mm hex key used to physically clear pivot channels during every transition takes less than 90 seconds and addresses the root cause directly. Not a glove swipe — a directed tool clearing of every cavity you can reach.
Where most people get stuck is believing that stomping the binding clear or banging the ski on the snow will dislodge ice from the internal pivot channels. It won’t. Snow on the exterior surface clears. Ice bonded inside the pivot geometry does not respond to impact — it responds to mechanical disruption or heat.
Thermal mitigation is underused. Keeping heel pieces covered with insulating binding covers during transitions slows the freeze-set dramatically. Even a chemical hand warmer held against a frozen toe piece for 60-90 seconds can restore function when a pick isn’t fully clearing the mechanism. I carry two in my binding kit every tour above 2,000m.
The turning point is usually the moment a tourer treats binding maintenance as a gear task rather than a safety task — that’s when the inspection habit becomes automatic.
What to Do When Release Failure Happens in the Field
When you discover your binding won’t release mid-descent, you have three immediate priorities: stop moving into more consequential terrain, warm and clear the mechanism, and reassess your descent route based on binding function status. The worst decision is to continue skiing a technical line with a binding you know is compromised — a non-releasing binding in a high-consequence fall zone is categorically more dangerous than the delay of a 10-minute field repair. As a WFR, I frame this as a primary assessment: you have an equipment failure affecting injury risk; treat it like you would treat a patient assessment — gather information, stabilize the situation, then act.
The third time I encountered complete bilateral binding freeze was on a guided group in the Haute Route conditions near the Swiss-Italian border, late April, wet heavy snow at elevation. Two clients had non-functional toe pieces within 15 minutes of each other. We stopped on a convex roll — safe from avalanche exposure — and I used a combination of tool clearing, hand warming, and dry PTFE from my kit. Both bindings were functional in under 20 minutes. We then switched to a lower-angle descent variant that I’d pre-identified as a contingency.
After looking at dozens of cases, the standard field repair sequence that works: 1) clear external snow with a hard brush or glove, 2) use a binding pick or hex key to mechanically clear all internal pivot channels, 3) apply sustained warmth (hand warmer, body contact) for 60-90 seconds, 4) test release function with ski off foot before committing to it, 5) apply PTFE spray if available and allow 5 minutes before testing again.
If the binding will not release after full field repair protocol, you do not ski committing terrain. You descend the safest available terrain, potentially with a controlled self-arrest strategy, and you treat it as the equipment emergency it is.
Binding Selection and Maintenance for Ice-Prone Conditions
Not all touring bindings have equal ice resistance, and understanding the design differences is a practical safety decision, not just a gear preference. Bindings with wider pivot channels and more accessible jaw geometry — like many of the newer Marker Alpinist and Salomon Shift designs — have measurably better ice drainage than older or more compact tech designs, because the geometry allows water to flow out rather than pool and freeze. However, no binding is ice-immune; the design only changes the timeline, not the risk category. Annual factory inspection and recalibration of release values is not optional — ice damage and mechanical wear from freeze-thaw cycling degrade calibration over one or two seasons of hard touring use.
Post-tour maintenance is as important as pre-tour preparation. After every wet-condition tour, bindings should be cleaned, dried, and inspected before storage — not left caked with ice and debris overnight. Freeze-thaw cycles in a cold car or gear room actively worsen ice damage to pivot mechanisms.
The pattern I keep seeing is gear purchased, set up once at the shop, and then used for three seasons without professional inspection. Release values drift. Pivot lubrication degrades. Mechanisms that tested fine at purchase are out of calibration by season two — and the first field test of that out-of-calibration binding is a serious fall.
Your binding is a life-safety system. Treat its maintenance schedule accordingly.
The Bottom Line
Ski touring binding ice buildup and release failure is not a fringe edge case — it’s a predictable, recurring risk in any wet-snow touring environment, and it kills knees and strands people in serious terrain every season. The fix isn’t expensive or complicated: dry PTFE lubrication 24 hours before tours, a binding pick in your jacket pocket at every transition, mid-tour inspection as a non-negotiable habit, and the judgment to stop skiing technical terrain when your release mechanism is compromised. Gear choice matters at the margins, but inspection discipline matters everywhere. If you only do one thing after reading this, add a 90-second binding pick inspection to every single transition — uphill and downhill — and do it every time without exception.
FAQ
Can I use standard WD-40 to prevent ice buildup in ski touring bindings?
No. WD-40 is a water displacer, not a dry lubricant, and it attracts and traps fine snow particles that then freeze into binding mechanisms. Use dry PTFE (Teflon) spray instead, applied 24 hours before touring so it fully cures. WD-40 used on binding pivots in wet conditions actively worsens ice adhesion over time.
How do I know if my binding’s release values have drifted due to ice damage?
You can’t reliably tell in the field without calibration equipment. The only accurate method is having a certified binding technician test release values with a Wintersteiger or equivalent binding tester. If you’ve had multiple freeze-thaw seasons without inspection, assume drift. Annual shop inspection is the minimum standard for any binding used in wet or spring conditions.
Is ice buildup worse with pin tech bindings versus frame bindings?
Pin tech bindings are more vulnerable to complete release failure from ice because their pivot geometry is tighter and harder to clear manually. Frame bindings have more mass and slightly better thermal retention, but their heel elevator and toe bail channels still accumulate ice in wet conditions. The difference is timeline and failure mode, not whether ice buildup occurs — both types require the same active prevention protocol.