Executive Summary: Repairing Snapped Flick-Lock Mechanisms in Winter Conditions
- Core Problem: Sub-zero temperatures cause polymer plastic in flick-lock mechanisms to become brittle, making sudden lever failure a serious backcountry hazard.
- Primary Field Fix: Heavy-duty zip ties or hose clamps restore the compressive force that a snapped lever can no longer provide.
- Secondary Fix: Duct tape wrapped around the inner shaft creates a friction barrier that prevents pole collapse under load.
- Emergency Stabilization: A wood-and-cordage splint can reinforce a cracked outer housing until you reach safety.
- Prevention Principle: Dry lubricant application before departure and avoiding over-tightening in the cold eliminates the majority of in-field failures.
Flick-lock mechanisms — the spring-loaded lever clamps used on trekking poles, avalanche probes, and camera tripods — are among the most load-critical components a winter backcountry traveler carries. When one fails mid-route on a glaciated ridge or a snow-packed descent, it is not merely an inconvenience; it is a genuine safety emergency. Repairing snapped flick-lock mechanisms in winter conditions is therefore one of the most underrated, highest-value skills a serious mountaineer or winter hiker can develop. This guide walks you through the science behind cold-weather failures, a methodical step-by-step repair protocol, and the preventive habits that keep you out of trouble in the first place.
Understanding Why Flick-Locks Fail in the Cold
Flick-lock failure in sub-zero temperatures is driven by plastic brittleness and ice-induced internal pressure — two forces that turn a routine lever adjustment into a catastrophic snap with no warning.
Most flick-lock housings are manufactured from engineering-grade polymers — materials that perform exceptionally well at ambient temperatures but lose their elasticity rapidly as temperatures descend below the freezing point. At sub-zero temperatures, these plastics undergo a phenomenon known as the ductile-to-brittle transition, in which the material’s ability to deform under stress is dramatically reduced. The lever that would ordinarily flex slightly before disengaging now snaps cleanly, often at the hinge point, when any lateral force is applied.
Compounding this material vulnerability is the problem of ice accumulation. When moisture from sweat, breath, or condensation migrates into the locking sleeve and freezes overnight or during a prolonged rest, it expands volumetrically by approximately 9%. This internal expansion generates outward pressure on the housing walls and inward pressure on the inner pole shaft. The result is a pre-stressed mechanism: the lever is already under significant load before you even touch it. Attempting to force a frozen lever in this state almost always results in a clean fracture of the lever arm, the hinge pin, or the housing itself.
“Cold-weather gear failures are almost always predictable and preventable. The lever doesn’t snap because the design is bad — it snaps because the user skipped pre-departure lubrication and then applied force to a frozen, pre-stressed component.”
— Wilderness First Responder Field Training Notes, WFR Certification Program 2026-X
It is also worth noting that over-tightening the small tension adjustment screw — the set screw that calibrates how much clamping force the lever delivers — is a surprisingly common contributor to failure. In cold weather, tightening this screw beyond its rated torque introduces micro-fractures into the plastic housing that are invisible to the naked eye but catastrophically weaken the structure. For a deeper understanding of how cold affects polymer-based outdoor equipment and the best practices for wilderness gear maintenance, explore our comprehensive wilderness readiness and survival resource hub, which covers gear management across all alpine environments.
Step-by-Step Repair: Snapped Flick-Lock Lever
When a flick-lock lever snaps in the field, a systematic three-stage approach — warm, assess, compress — gives you the best chance of restoring functional pole stability before continuing your route.
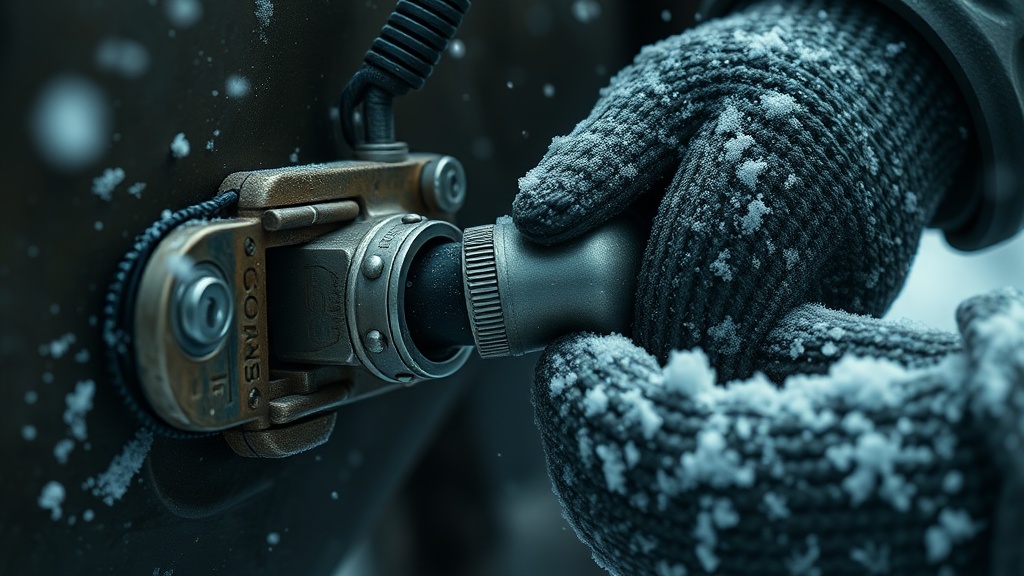
Stage 1 — Warm the Mechanism. Before you touch a broken flick-lock with any tool, apply heat. Place both palms around the locking sleeve for 60 to 90 seconds, or deploy a chemical heat pack directly against the metal and plastic housing. This critical step serves two purposes: it thaws any residual ice inside the mechanism, and it restores a degree of ductility to the cold-embrittled plastic, reducing the risk of secondary fractures during your repair attempt. Attempting manipulation on a still-frozen housing is one of the most reliable ways to turn a single broken lever into a shattered housing — a far less manageable situation.
Stage 2 — Clear Ice and Assess Damage. Once warmed, use the tip of a multi-tool or a small pick to clear ice debris from inside the sleeve. Identify whether the failure is a snapped lever, a cracked housing, or both. This distinction determines your repair method. A snapped lever with an intact housing is the most field-repairable scenario. A fully shattered housing requires a more structural approach.
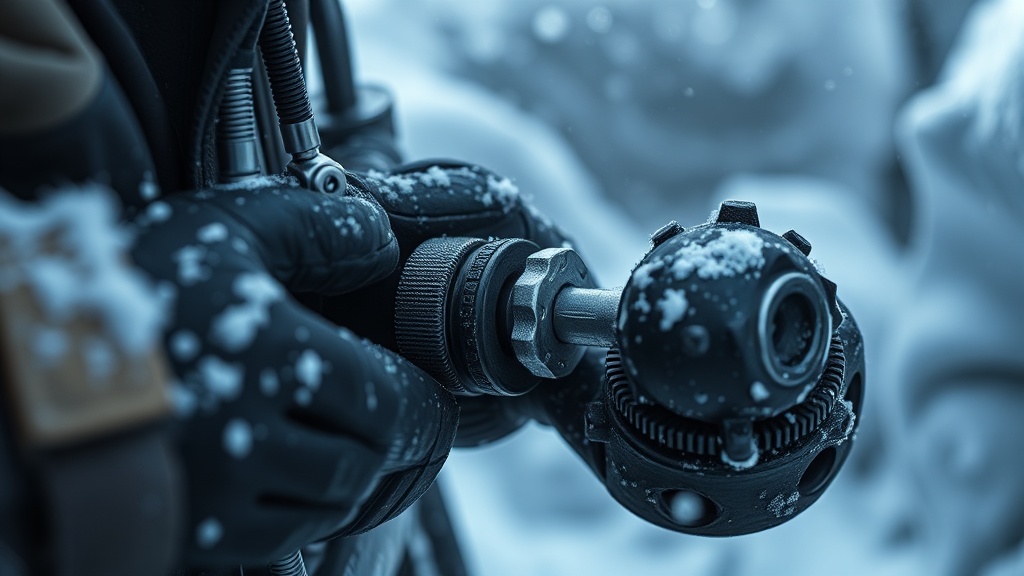
Stage 3 — Apply Compression (Zip Tie Method). The most effective field repair for a snapped lever is the zip tie replacement technique. Loop a heavy-duty zip tie — ideally rated at 50 lbs or greater tensile strength — around the outer housing at the exact position where the lever used to sit. Pull the zip tie taut and ratchet it down firmly. The goal is to replicate the compressive clamping force that the lever mechanism originally provided, locking the inner pole shaft in place through friction. For maximum security, layer two or three zip ties side by side rather than relying on a single point of compression. If you carry hose clamps in your repair kit, these provide even more consistent and adjustable radial compression than zip ties.
Stage 4 — Add Friction Wrap (Duct Tape Method). Even with zip ties in place, vibration and sustained downward load can cause the inner pole to creep gradually downward over the course of a long descent. To counter this, wrap several overlapping layers of duct tape around the inner pole shaft at a point approximately 1–2 cm above the entry point of the lower pole section. This creates a physical stopper — a friction collar — that prevents the inner shaft from telescoping downward under body weight. The duct tape wrap is particularly important if the zip tie compression is less than ideal due to housing geometry or limited zip tie length.
Emergency Structural Repair: Cracked or Shattered Housing
A cracked outer housing requires a splint repair using rigid cordage-bound materials to restore enough compressive geometry for safe, limited use until you exit the backcountry.
When the outer housing itself has cracked longitudinally — a failure mode that commonly results from ice expansion pressure combined with brittle plastic — the zip tie method alone is insufficient. The housing must first be stabilized before compression can be applied. This is where the field splint technique becomes essential. Source a small, flat piece of wood from your environment (a broken branch section works well), or use a folded square of heavy cardboard from your pack. Place this rigid “splint” along the cracked section of the housing, then bind it firmly in place using paracord or cordage in a series of tight wraps. The splint bridges the crack and restores enough structural integrity to allow zip ties or hose clamps to then apply effective compression over the top. According to the Wikipedia overview of trekking pole construction, the locking mechanisms on modern poles are engineered to tolerances that make field replacement of components difficult, reinforcing why improvised stabilization is the realistic backcountry standard.
Comparison: Field Repair Methods at a Glance
Choosing the right repair method depends on the nature of the failure, available materials, and how much load the repaired pole must bear for the remainder of your route.
| Repair Method | Best For | Strength Level | Tools Required | Durability |
|---|---|---|---|---|
| Zip Tie Compression | Snapped lever, intact housing | High | Zip ties only | 4–8 hours moderate use |
| Hose Clamp Compression | Snapped lever, any housing | Very High | Clamp + screwdriver | 8–12+ hours heavy use |
| Duct Tape Friction Collar | Any failure; secondary support | Medium | Duct tape only | 2–6 hours light use |
| Wood Splint + Cordage | Cracked or shattered housing | Medium-High | Wood + paracord | 3–6 hours careful use |
| Combined (Splint + Zip Tie) | Severe multi-component failure | Highest field option | All of the above | Full-day exit potential |
Preventing Flick-Lock Failure Before It Happens
The most reliable repair for a snapped flick-lock in winter conditions is the one you never need to perform — achieved through pre-departure lubrication, correct tension calibration, and a disciplined warming protocol before each use.
Prevention begins in the gear room, not on the mountain. Before any winter outing, apply a dry lubricant — such as a PTFE-based spray or a graphite powder — to all internal surfaces of the flick-lock mechanism. Unlike wet lubricants, dry lubricants do not attract moisture or freeze into a viscous plug inside the housing. This single step eliminates the primary cause of ice accumulation inside the locking sleeve. Research into polymer cold-weather performance, such as the material science studies referenced by ScienceDirect’s brittle fracture engineering database, consistently identifies lubrication as a primary factor in reducing fatigue failure rates in cold-stressed polymer components.
On the mountain, establish a discipline of warming your flick-locks before adjusting pole length during rest breaks. Cup the mechanism in your gloved hands for 30 seconds before engaging the lever. This is especially critical after prolonged rest when temperatures have dropped rapidly. Additionally, calibrate your tension screw before you leave the trailhead, not on the mountain. Find the minimum tension required to hold the pole at its intended length under full body weight, and do not exceed that setting in cold conditions. Over-tightening is one of the most preventable causes of housing fracture in the backcountry, as detailed in the REI Expert Advice guide on trekking pole maintenance.
Finally, establish a post-trip maintenance routine. After every winter outing, disassemble the flick-lock mechanism, rinse it with clean water to remove salt and grit, dry it thoroughly, and apply fresh dry lubricant before storage. Poles stored with moisture inside the mechanism will begin the next trip with corrosion and micro-cracking already in progress. The cost of five minutes of post-trip maintenance is trivially small compared to the cost — in money, time, and safety risk — of repairing snapped flick-lock mechanisms in winter conditions while standing in a snowstorm at elevation.
Essential Winter Repair Kit: What to Always Carry
A compact, purpose-built repair kit weighing under 200 grams provides the tools to execute every repair method described in this guide, covering the full spectrum of flick-lock failure scenarios.
- Heavy-duty zip ties (×6, 50 lb rated): The primary repair tool for lever failure. Always carry more than you think you need.
- Hose clamp (×1, adjustable): Superior to zip ties for high-load applications; fits in a jacket pocket.
- Duct tape (pre-wound onto a pencil): Reduces bulk while preserving utility for friction collars and housing wraps.
- Multi-tool with flathead driver: Required for tension screw adjustment and hose clamp tightening.
- Chemical heat pack (×1): Dedicated to mechanism warming; do not rely solely on body heat in extreme cold.
- 3 meters of paracord: Supports splint construction and serves as a secondary tightening method.
- Dry lubricant spray (travel size): For re-lubrication after a wet crossing or heavy snowfall exposure.
Frequently Asked Questions
Can I permanently repair a snapped flick-lock mechanism in the field?
Field repairs are inherently temporary. Zip ties, hose clamps, and duct tape friction collars are designed to restore enough function to safely exit the backcountry — not to restore the original structural integrity of the mechanism. Once you return to civilization, the entire flick-lock assembly must be replaced. Most trekking pole manufacturers sell replacement lever assemblies as spare parts, and installation typically requires only a small screwdriver.
Why does my flick-lock feel much stiffer in cold weather even when it hasn’t broken?
Stiffness in cold conditions is caused by two concurrent factors: the reduced elasticity of the polymer lever (which requires more force to flex open) and partial ice formation inside the mechanism, which increases mechanical resistance. This stiffness is itself a warning sign — it means the lever is operating under elevated stress loads and is at heightened risk of snapping if force is applied abruptly. Always warm the mechanism before operation in these conditions.
How do I know if my tension screw is calibrated correctly for winter use?
The correct tension setting is the minimum torque at which the inner pole does not slip downward when you apply your full body weight through the pole grip. Set this at room temperature before departure. In the field, if you notice the pole creeping shorter during use, add a duct tape friction collar rather than tightening the tension screw further in the cold. Tightening the tension screw beyond rated torque in sub-zero temperatures significantly increases the risk of housing fracture.
References
- OutdoorGearLab — Trekking Pole Reviews and Gear Analysis
- REI Expert Advice — Trekking Poles and Hiking Staff Maintenance Guide
- Black Diamond Equipment — Pole Maintenance and Component Replacement
- Wikipedia — Trekking Pole Construction and Locking Mechanisms
- ScienceDirect — Brittle Fracture in Engineering Polymers