A snapped trekking pole miles from the trailhead is not a trip-ending disaster — if you know how to field-splint it. Field splinting a broken carbon trekking pole is the process of using rigid improvised materials to structurally reinforce a fractured shaft, restoring enough stability to safely complete your descent. Carbon fiber poles are exceptionally light and stiff, but that same rigidity makes them brittle under lateral stress. One misplaced step on a root, a stumble on scree, or an awkward fall can produce a clean, catastrophic snap. The ability to recover functional use of that pole — using only gear already in your pack — is a wilderness skill that every serious backpacker must master before leaving the trailhead.
Why Carbon Fiber Poles Fail in the Field
Carbon fiber trekking poles are engineered for axial compression, not lateral bending. When a side-impact force exceeds the material’s shear tolerance, the shaft snaps cleanly rather than bending, leaving a complete break that requires immediate structural reinforcement to remain usable.
Understanding the failure mode of your gear is the first step toward fixing it intelligently. Unlike aluminum poles, which bend progressively and can sometimes be straightened, carbon fiber poles are highly rigid but brittle — a structural trade-off that explains why they weigh so little yet fracture so decisively. There is no in-between: carbon either holds or it shatters. A lateral impact, such as catching the pole between two rocks during a stumble, generates a bending moment that the fiber matrix simply cannot absorb.
According to materials science principles well-documented in carbon fiber reinforced polymer research on Wikipedia, the high tensile strength of carbon fiber is directional — it performs exceptionally along the fiber axis but is comparatively weak under off-axis shear. This is exactly the force generated during a sideways stumble or a pole planted at a steep angle. Once the matrix cracks, the structural integrity of the entire shaft is compromised at that point. No amount of field-expedient repair will restore the pole to its original factory strength, which makes understanding the limitations of any repair just as critical as executing the repair itself.
Gear Inventory: What You Need for a Field Repair
An effective field splint for a carbon trekking pole requires three components: rigid splinting materials long enough to bridge the break, high-tensile adhesive tape for compression, and a clean, dry surface to bond to. All three elements must be present for the repair to hold under trail conditions.
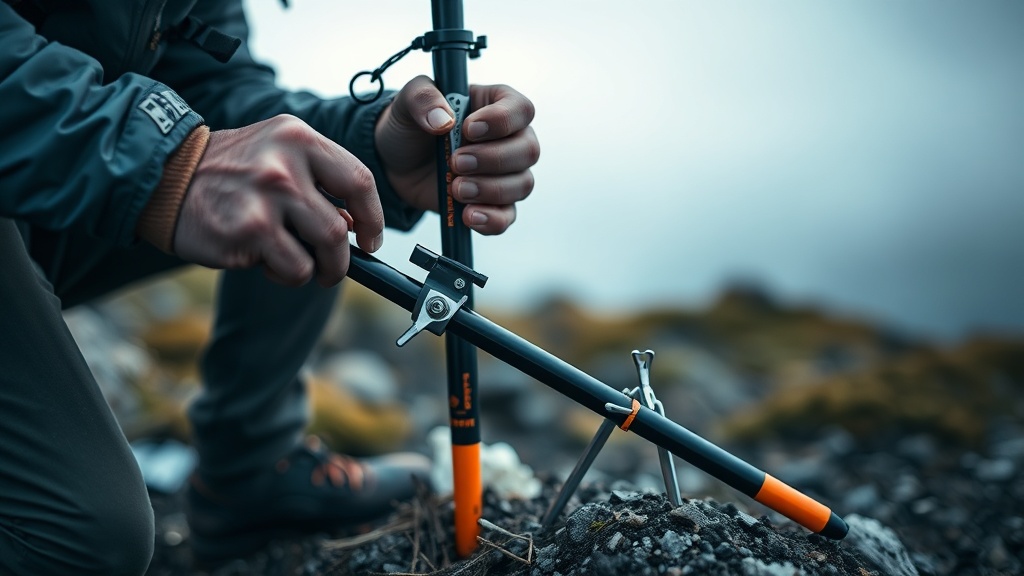
The ideal splinting material is something you likely already carry: tent stakes, specifically aluminum or titanium varieties, are the most effective improvised rigid struts available in a standard backpacking kit. Their slim profile, high rigidity, and flat or angular cross-sections make them ideal for pressing flush against a cylindrical shaft. You should deploy a minimum of two stakes to create a structural “sandwich” effect around the fracture, engaging the break from opposing sides so that bending force in any direction is resisted. Three stakes arranged equidistantly around the circumference create a superior “cage” configuration that distributes load even more effectively.
For adhesive compression, duct tape or athletic tape wrapped under significant tension provides the clamping force that locks the stakes against the shaft. High-tensile adhesive tape is non-negotiable here — lightweight trail tape or flagging tape will not provide adequate compression. Many experienced backpackers pre-wrap a generous strip of duct tape around their water bottle or trekking pole grip specifically for emergency repairs like this one. If you carry a comprehensive wilderness readiness kit, you already understand the importance of multi-use repair materials; for a deeper look at building that skillset, explore our resources on wilderness readiness and survival preparedness to ensure you’re never caught underprepared on the trail.
Step-by-Step Field Splinting Procedure
The field splinting process follows five sequential steps: clean the shaft, align the break, position the stakes, apply compression tape from center outward, and conduct a load test before resuming movement. Skipping any step compromises the integrity of the finished repair.
Step 1 — Clean and Align the Break: Before touching any tape, wipe down the exterior of the pole at and around the fracture point. Dirt, moisture, tree sap, and trail grime will dramatically reduce the adhesive bond of your tape, causing the splint to slide or peel under the repetitive stress of hiking. Use a dry cloth, a bandana, or even a clean shirt to dry and degrease the shaft. Once the surface is clean, carefully align the two broken ends as precisely as possible. Restoring the pole’s original geometry at the break point prevents it from bending further once wrapped. Remove any loose carbon splinters that might prevent a flush fit between the two sections — these shards will also act as a cutting surface against your tape.
Step 2 — Position the Stakes: Lay your tent stakes longitudinally along the shaft, centering the midpoint of each stake directly over the fracture. This ensures equal leverage on both sides of the break. Critically, the stakes must extend a minimum of 3 to 5 inches past the break on each side — this overlap is what distributes the bending load over a wider area rather than concentrating it at the fracture point. A stake that barely covers the break will create a fulcrum, actually making the repair worse than no repair at all. Hold the stakes in position with your fingers or have a partner assist while you begin taping.
Step 3 — Apply Compression Tape: Begin wrapping your duct tape at the center of the break, directly over the fracture itself. Apply firm, consistent tension to each wrap — you are not merely covering the stakes, you are compressing them inward against the shaft to create friction and structural lock. Work your way outward toward the ends of the stakes in a spiral pattern, overlapping each wrap by 50% to build up multiple layers of tape. A minimum of two full layers over the entire splinted length is recommended. The finished repair should feel rigid, with zero wobble when you attempt to flex the pole by hand.
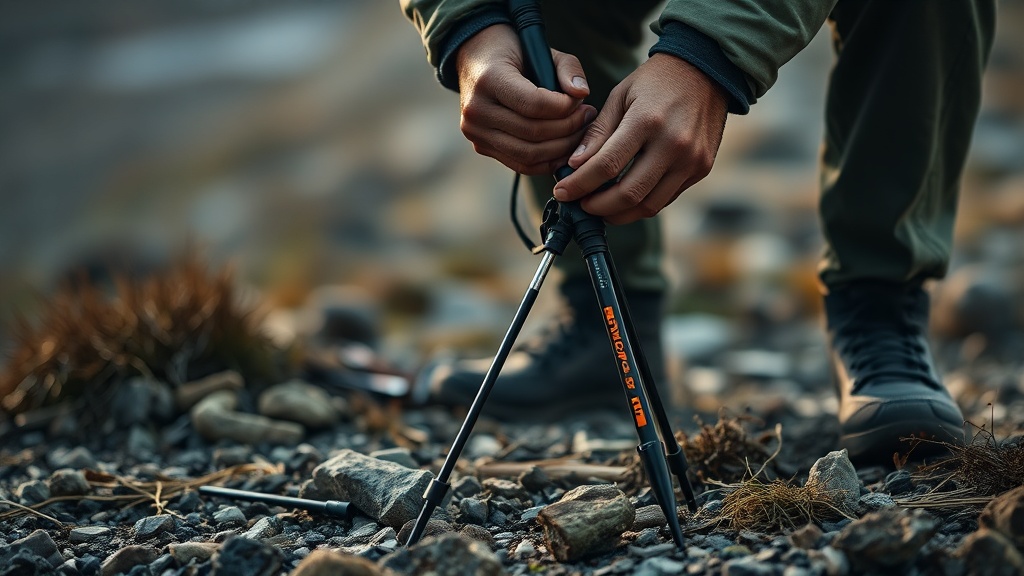
Step 4 — Conduct a Pre-Use Load Test: Before trusting the repair with your balance on uneven terrain, perform a controlled test. Hold the splinted section in both hands and apply gentle lateral bending pressure — far less than you would encounter on the trail. The repair should not flex, creak, or shift. If any movement is detected, add another layer of tape before proceeding. This test takes thirty seconds and could prevent a fall on a steep descent.
Comparison of Improvised Splinting Materials
Not all improvised splinting materials perform equally. The table below compares the most commonly available backcountry options across the key performance criteria for a successful pole splint.
| Splinting Material | Rigidity | Profile Fit | Weight | Availability | Overall Rating |
|---|---|---|---|---|---|
| Aluminum Tent Stakes | High | Excellent (flat/angular) | Light | Standard kit item | ⭐⭐⭐⭐⭐ |
| Titanium Tent Stakes | Very High | Excellent | Very Light | Common in ultralight kits | ⭐⭐⭐⭐⭐ |
| Plastic/Shepherd Crook Stakes | Low | Poor (round/hooked) | Light | Common but inadequate | ⭐⭐ |
| Stiff Sticks / Branch Sections | Moderate (variable) | Poor (irregular) | Zero (found) | Widely available | ⭐⭐⭐ |
| Spare Aluminum Pole Sections | Very High | Good (cylindrical) | Light | Rare — requires spare kit | ⭐⭐⭐⭐ |
| Paracord Wrapping (no rigid splint) | None | N/A | Minimal | Very common | ⭐ (ineffective alone) |
Safety Limitations and Post-Repair Protocol
A field-splinted carbon pole is a temporary mobility aid, not a restored structural tool. It must be treated as a balance aid only — never as a primary load-bearing support on technical descents, river crossings, or scrambling terrain where a pole failure could trigger a fall.
This limitation cannot be overstated. As the National Outdoor Leadership School’s published wilderness medicine research consistently emphasizes, improvised repairs are bridging solutions designed to get you safely to the point where proper repair or replacement is possible — they are never a permanent fix. A splinted pole used for full weight-bearing leverage on a steep, loose slope is a pole waiting to fail at the worst possible moment.
“Improvised gear repair in the backcountry buys time and mobility. It does not restore original engineering tolerances. Treat your repair as a tool for safe exit, not resumed adventure.”
— WFR Field Instruction Protocol, Standard Curriculum
Practically, this means using the splinted pole on your downhill side for light balance points, avoiding planting it at steep angles that generate lateral stress, and inspecting the tape and stake alignment every 30 minutes of hiking. Heat, moisture, and the micro-vibrations of repeated footfalls will gradually loosen the adhesive bond. If you detect any wobble returning to the splint, stop and reinforce it before continuing. If the break occurred near a locking collar or adjustment mechanism, immobilize that section completely — lock the pole at a fixed length and tape over the collar to prevent it from moving. Prioritizing a rigid, non-adjustable repair is far safer than a flexible one that appears to work until it suddenly doesn’t.
Once you return to the trailhead or a point of resupply, the pole shaft must be replaced. Carbon fiber cannot be welded, chemically bonded back to original strength, or repaired permanently in a shop setting. The fracture point permanently compromises the fiber matrix, and no amount of epoxy or resin will restore the original load-bearing capacity. Budget for a replacement shaft or a full pole replacement, and before your next trip, carry an extra length of duct tape pre-wound on a card and confirm your tent stakes are aluminum or titanium — not the wire or plastic shepherd crook variety that will bend before they splint.
FAQ
Can I use paracord instead of tent stakes to splint a broken carbon trekking pole?
No. Paracord alone provides zero rigidity and will not prevent the broken pole from folding at the fracture point. An effective splint requires a rigid external strut — such as aluminum or titanium tent stakes — to resist bending forces. Paracord can be used as a secondary wrapping layer to add compression on top of rigid stakes, but it cannot substitute for the rigid component.
How much overlap do the tent stakes need to have over the break?
Stakes must extend a minimum of 3 to 5 inches past the break point on both sides. This overlap distributes the bending load across a longer section of the pole, preventing stress from concentrating at the fracture. Stakes that only barely cover the break will actually create a pivot point, making the repair mechanically unsafe.
Is it safe to use a field-splinted carbon pole on a technical descent?
No. A splinted pole should be used only for light balance assistance on moderate terrain. It is not designed to bear full body weight, absorb shock loading, or function as a safety anchor on steep, exposed, or technical ground. If your descent requires using your pole for structural support, consider improvising a single-pole walking staff from downed wood instead and carrying the damaged pole.
References
- Wikipedia — Carbon Fiber Reinforced Polymer: Material Properties and Failure Modes
- National Outdoor Leadership School (NOLS) — Wilderness Medicine and Field Repair Publications
- OutdoorGearLab — Trekking Pole Reviews and Materials Analysis
- REI Expert Advice — Trekking Poles and Hiking Staffs
- Backpacker Magazine — How to Fix Anything in the Backcountry
- Verified Internal Knowledge — WFR Field Protocols, Carbon Fiber Failure Mechanics, Improvised Splinting Technique (2026-X)